 Last week I stayed at my sister’s house to watch her 4 kids while she and her husband went on a trip to Italy. While there, I asked if I could paint her kitchen island for her. She agreed so I thought I’d share the process.
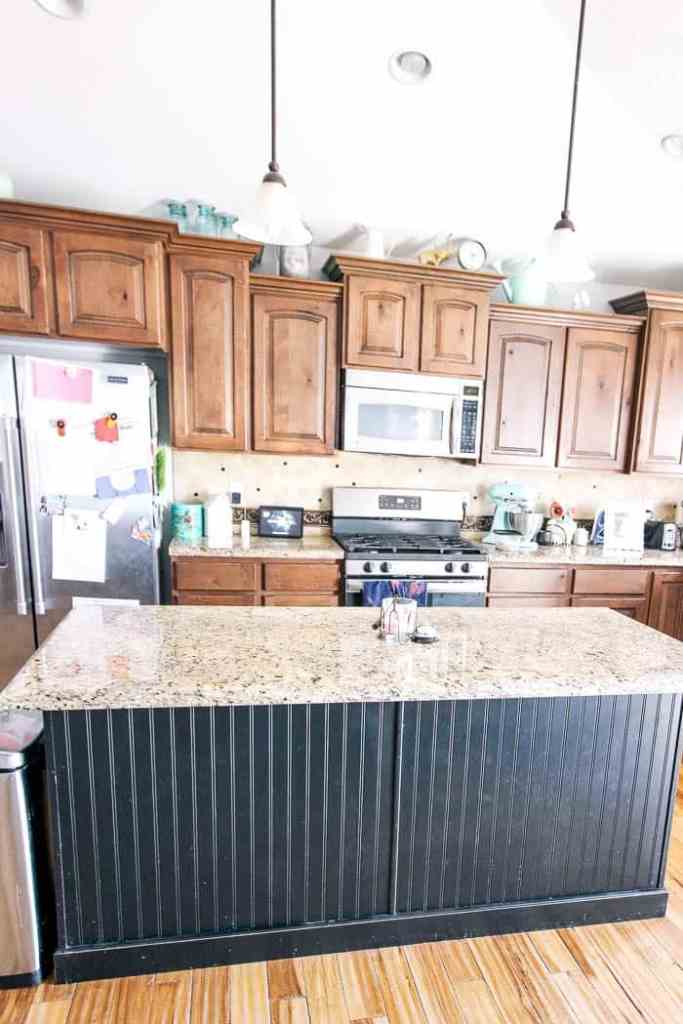
Here’s the thing- my sister lives in a beautiful home that was built less than 10 years ago. Technically, everything is in great shape. But in reality, not everything matches her personality. So little by little she’s been making tweaks to make it feel more like her. If you live in a builder home that doesn’t feel like you- this post is for you!
You can see in the before pictures that the only thing black in her kitchen was the island. Everything was a neutral with accessories in a pop of mint. I knew that if the island went mint, it’d pull the whole room together and make it feel lighter and brighter.
how to paint a kitchen island SUPPLIES
- Sea Glass chalk paint
- Brown Wax
- Slick Stick (if you have high gloss or slick cabinets)
- Caulk
- Caulk Gun
- Painter’s Tape
- Paint Brush
- TSP
- Rags
- Drop Cloth

step 1
Start by cleaning the island really well. I used TSP and a wet rag. It’s important to get any stuck on food off or the paint will chip there.
Use painter’s tape along the perimeter to protect the floor from paint. I love and use Frog’s tape in the thicker size for more protection.
step 2
Next, start with your first coat of paint. If your cabinets are super slick, you’re going to want to prime with Slick Stick first. The beauty of using chalk paint is that you don’t have to sand first! You can just start painting!
If you haven’t used chalk paint before, just know that you’ll always need to do 2 coats of paint. This is a picture of the first coat and you and see that it isn’t full coverage yet. That is ok because the paint dries quickly! So by the time you’re done with one coat, its usually dry enough to do a second coat.
Here is a picture after the second coat and you can see that everything has even coverage.
step 3
And now it’s time to do a top coat. With chalk paint, though you don’t need to sand, you do need to do a top coat. Personally, I like a clean look and so I use a clear satin top coat. My sister likes a distressed look so I wax things for her.
It’s been awhile since I’ve waxed anything so I had to reteach myself. Here’s what I did that worked best- put on the wax lightly. Pretty much, how it looks when you put on the wax is how it’ll look forever. So you just use a lint free rag to apply the wax and then you wait 15-20 minutes before using a rag to buff the wax. It’ll lighten up softly with buffing, but only slightly.
How much wax you apply will make the difference with how distressed it looks. If you add too much wax, wait for it to dry and then layer on some paint. This layered look is really pretty and will lighten everything.
For around the doors and drawers I mostly did around the edges and molding to bring out those beautiful details.
after
Here’s the island all painted!
It honestly makes the whole room feel more pulled together. The blue just feels more like my sister and is so nice and light and happy.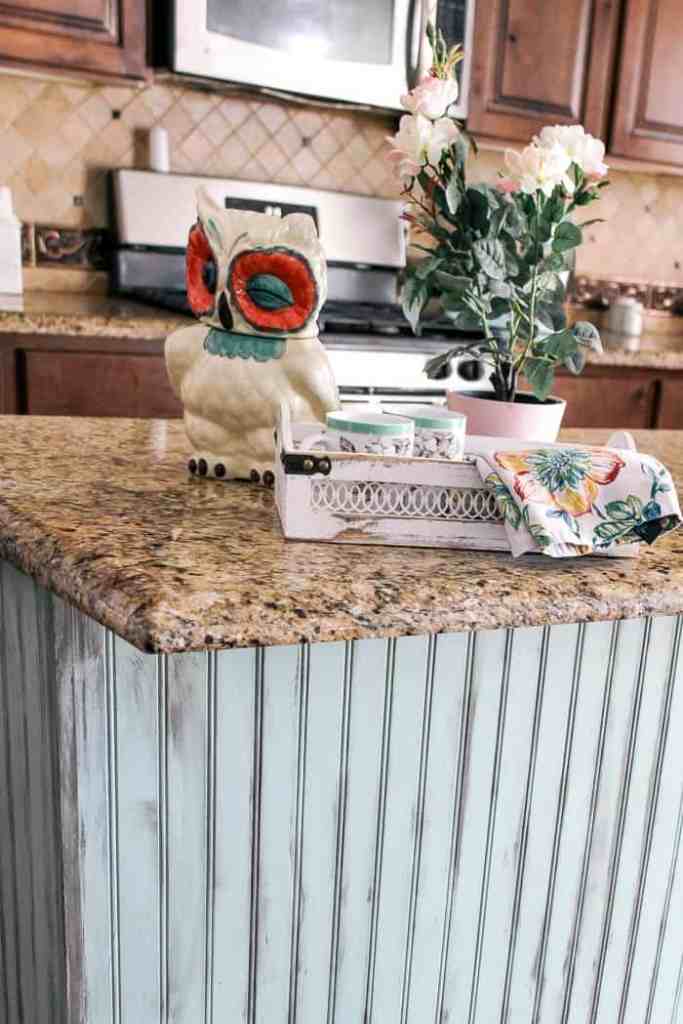
If you have a builder grade house and you’re scared of “messing it up,” let me be the one to give you permission to make changes to the house. Life is too short to live it in a home that doesn’t feel like you.
 This post contains some affiliate links for your convenience. Click here to read my full disclosure policy.
If you love it, pin it!
Incredible! You babysit and redo her island, what a blessing! Looks great & definitely ties the pops of blue in the kitchen together ❤