I’m hosting an event in Charleston, South Carolina this week. So I thought I could create oyster shell place cards to add an elegant and beauty touch to the welcome dinner table setting. This would be great for special occasions like a wedding or baby shower. Here’s a simple step-by-step guide on how to make this oyster shell place cards DIY.
OYSTER SHELL PLACE CARDS DIY
Let’s start with the video tutorial so you get an overview on what I did. Then, I’ll dive in with more details below:
If the video doesn’t work here, you can watch it on YouTube here. It’d mean so much if you’d watch the video! I’m trying to get better at my video skills so I can grow my YouTube channel. If you have a few minutes to watch this and/or subscribe, I’d so appreciate it.
SUPPLIES
- Oyster shells (cleaned and dried)
- Small paintbrush
- White acrylic craft paint
- Gold liquid leaf paint
- Paint palette or a disposable plate
- Mod Podge
- Gold paint pen
- Paper napkins
step 1- prep
Start by thoroughly cleaning and drying the oyster shells (if needed). To clean them, it works great to soak them in warm soapy water. Then scrub them gently with a brush to get them clean and remove orders. Rinse them well and let them air dry.
My oysters came from a restaurant so they needed to be cleaned. If not getting them from eating out, oysters are also available online from Amazon and Etsy. This decoupage kit is also an option- it has 6 shells and all other supplies needed to make this.
step 2- paint
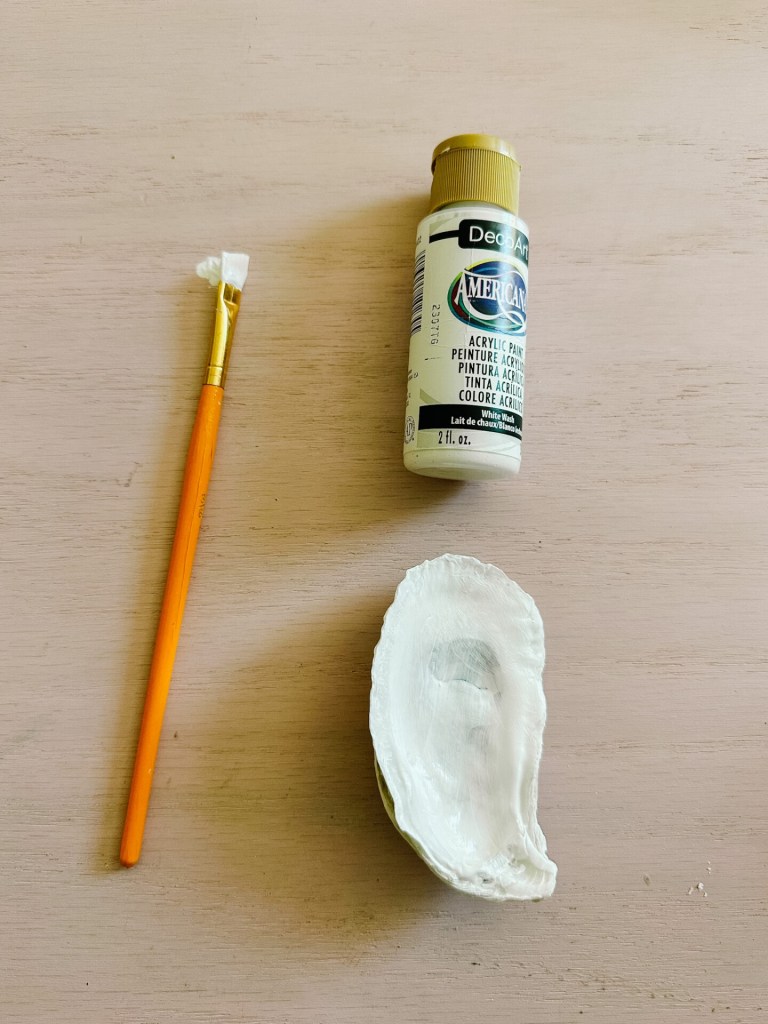
Next, paint the inside of the oyster shells. Using a small paintbrush, cover the inside of the oyster shells with White acrylic craft paint.
Make sure to use a few coats of paint to fully cover the darker spots so they don’t show through for the next step. Mine needed 3-4 coats of white paint. Let each coat dry before applying the next one.
step 3- attach the napkins
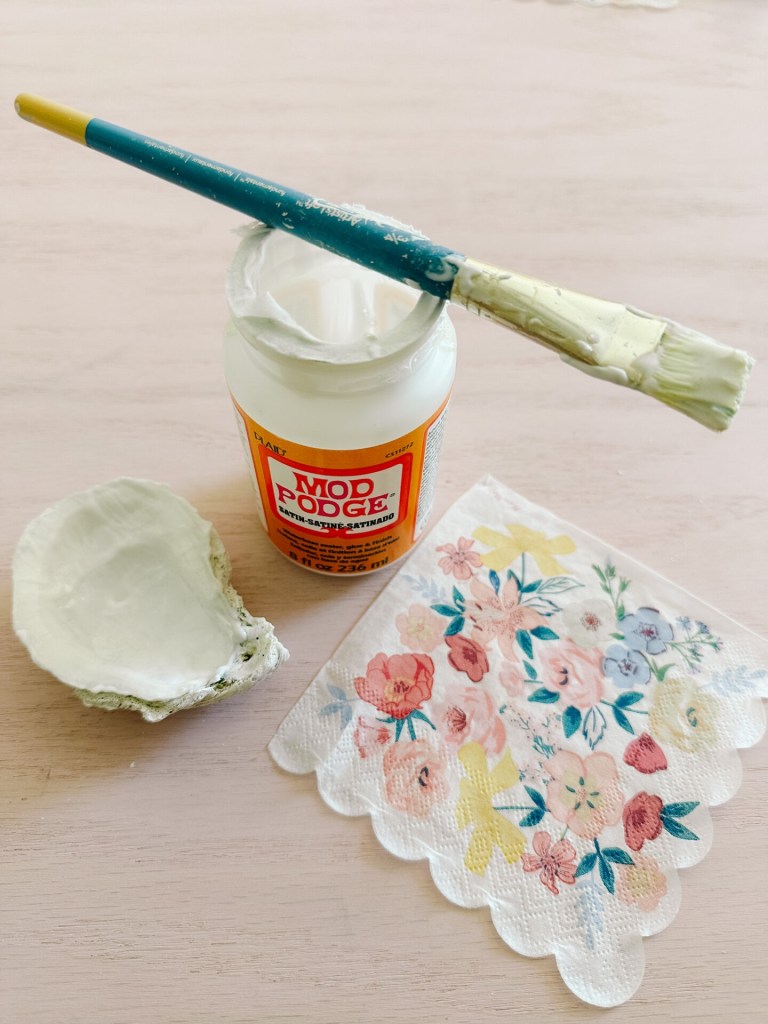
And now, let’s get to work on adding the pattern to the shell. For that, I’m using some super cute flower paper napkins. The printed napkins are three layers. Carefully remove the outer from the two inner layers of the napkin by peeling it apart.
Use scissors to carefully cut the napkin on the fold lines. This section will be used for the oyster shell place cards DIY. I’m using 1/4 of a napkin for each shell.
Apply a layer of Mod Podge on the interior of the oyster shell with a paint brush- this is how the napkin will adhere to the shell.
Push the napkin onto the wet Mod Podge.
Use the same paint brush to add more of the Mod Podge on top of the napkin to decoupage it onto the shell.
Brush out any wrinkles of air bubbles out of the napkin to make sure there’s a smooth look. Be gentle to prevent the napkin from tearing. I like to especially push the paint brush against the edges of the oyster shell to help with the next step.
The Mod Podge also will protect the napkin and make the whole thing water proof. Which is really nice if it’s used as a trinket dish.
Where there’s extra napkin sticking out along the edges, carefully tear or cut it off while the paper is still wet. Go slowly because its easy to tear off extra napkin if not being careful.
Let the shell dry completely. Mine took over an hour to dry since I was liberal with the Mod Podge. Aren’t the oyster shells looking so nice?! I love the pattern!
step 4- gold edges
To highlight the edges of the shell, add metallic gold liquid leaf paint . Start by shaking the bottle really well. Apply with a small paint brush along the outer rim going slowly to only get the edges. I’m using a special paint to give the look of liquid gold- it looks very luxe and elegant!
I’ve never used this paint before, but it went on with one coat and seriously looks amazing! The downside is that it is very stinky. Make sure to open a window and turn on a fan for ventilation. Also, the paint can only be cleaned off with paint thinner. That’s a bit of a pain so I suggest using an old paint brush that can be thrown away.
Let the paint dry completely. This takes 20-30 minutes.
step 5- write the names
Finally, use a gold paint pen to write the names of the guests on the oyster shells. I’m using an oil based Sharpie for this step. The pen needs to be shaken well before using. I like to have a scrap piece of card stock next to where I’m working so I can push the tip down to load the marker.
Then I just write the name- pretty simple. The gold is a little hard to read so black might be a better choice for a wedding with a lot of guests. But I love the subtle gold!
after
And here are the decoupaged oyster shell place cards!
I love how they’ll a unique and charming touch to my event.
Besides making the table setting look better, they also make a beautiful, personalized keepsake for my guests.
I set up a little place setting outside to show off the oyster place cards DIY. It was fun to lean into that southern vibes! I picture stripes, rattan, and bamboo as the perfect compliment to the oyster shells.
price breakdown
For this project, I spent $19. I just needed to buy the gold liquid leaf paint (which cost $12) and the paper napkins (which cost $7).
I already had the oyster shells, small paintbrush, white acrylic craft paint, Mod Podge and gold paint pen on hand.
So that makes this a very reasonable project! Plus it’s reusing the oyster- which I love transforming trash to a treasure.
So there you have it! The oyster place cards DIY! I think the fun napkins and gold leaf really make this project. And you can totally change the look with different napkins (blue and white ones are really popular for this craft).
These are fun because they can be re-used as a ring or trinket dish. Drill. a hole and it can be an ornament. It’d be great for a bridesmaid gift. In an office it can hold paper clips. The possibilities are endless!
Do you like how the oyster shells turned out? Do you have any questions on making them? Let me know in the comments!
 This post contains some affiliate links for your convenience. Click here to read my full disclosure policy.
If you love it, pin it!


I find this art craft very sweet but I am not able to read this. Maybe in person is easier, hope so.