 After we finished renovating the top floor of our house, it made sense to redo the stairs. Might as well! The stairs were extremely creaky and so we couldn’t wait to figure out what was going on!
before

The wood on the stairs was beat up. We’d replaced the plaster on the left wall with the playroom renovation. All I needed was a vision. And don’t worry, I had it- a pastel rainbow staircase. Sometimes, having a big vision makes all of the crappy work worth it!
inspiration

The Sugar and Cloth stairs in Texas are what inspired my choice. I just love those soft colors!
So I went to the store and gathered samples-
stair colors

After looking at all the colors in the space, I narrowed it down to 13. A few of them I specifically used since I already had the paint and love being economical where I can. Those were my front door color, playroom color, and Don’s room color. As I’ve shared the process on Instagram Stories I’ve been asked for the exact colors I’m using. Here you go!
 1. Beloved Pink, 2. Shy Smile, 3. Ballet Rose, 4. Coral Fountain, 5. Lamplit, 6. Corn Stalk, 7. Frittata, 8. Frosted Sage, 9. Spring Reflection, 10. Country Weekend, 11. Serene Breeze, 12. Casade Green 13. Watery

Aren’t they SO pretty together?! Though, side note, I will be switching the order of 11 and 12. They don’t flow as well as I’d like on the stairs (I’ll show you what I mean in a minute). For the risers, I bought sample pots for $4.27 each. That has been more than enough paint.
demo
We did a little demo on the stairs and guess what? The wood treads were covering up the original stair case. We figure that the wood on wood was the reason for the creaky stairs. The last owner of our house had the “fun” habit of just covering things up instead of doing them right.
From taking off the top layer of the stairs, it looks like the staircase used to be open to the kitchen. We’d love to reopen that wall again one day! It was also evident that the stairs were at one point carpeted. At this point, we ordered the new treads for the space.
new treads
We ordered these oak treads. Our stairs are a little more narrow than what they stock in store. It was about $250 for the wood for all of our stairs. The wait was a week for these to be delivered, so this project has felt a little slow to get going.
After the stairs were fully demo’d, my husband cut a tread specifically for each stair. He pulled up the old stair tread and then replaced it with the new one.
stain

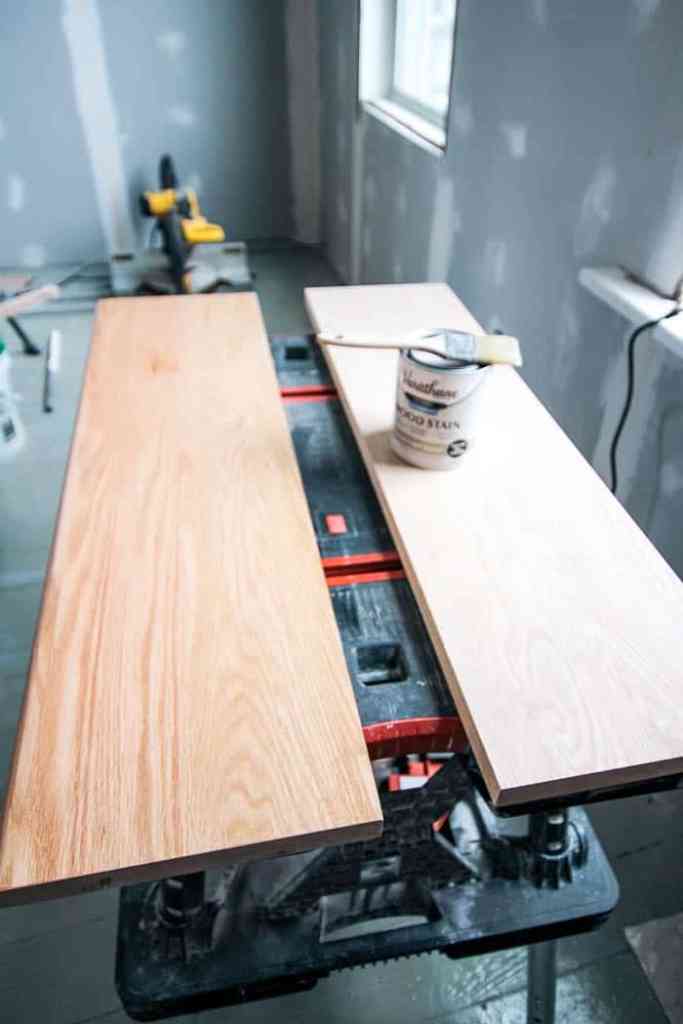
I like how lightly colored the floors are, so I definitely didn’t want to do a dark stain. I tested two stains- clear (on the left) and weathered oak (on the right). After they dried, I ended up liking clear because its the lighter option and feels more modern.

Once I’d determined the color, I stained each one. I used a brush to lightly brush on a coat. Then I immediately used a rag to remove any extra stain.

Since we use the stairs so much, we only stained 4 at a time. We used the old treads in their place while we sanded and stained each one.

stair installation
To install the treads, each step is glued in with construction adhesive and then we used 2 screws per stair to secure them.
I used wood putty to fill the holes and they practically disappeared. Thank goodness! Because no one wants to see screws or holes.

rainbow paint

Painting these stairs was one of the great joys in my life! Lol! But really. I spent a LOT of time caulking each riser to fill all of the cracks and nail/staple holes. The surface is still a little “rustic,” but I don’t mind. Also, above is where you can see that I need to change the 11th and 12th color for the rainbow to flow better.
When the first coat had been applied, I walked past and felt like these stairs now belong in my house. They pull everything together and dang it, they make me SO happy! #obsessed
I was sure hoping to be done with this project, but sadly, I’m not. The treads need a top coat of polyurethane. Then trim needs to be installed on each side of the stairs. Lastly, each stair needs to be caulked and given a final coat of paint. 
I am SO excited to get this project finished! It’s been a little slow going, but is already world’s better!
UPDATE- the stairs are done! Click here to see how they turned out!
 This post contains some affiliate links for your convenience. Click here to read my full disclosure policy.


