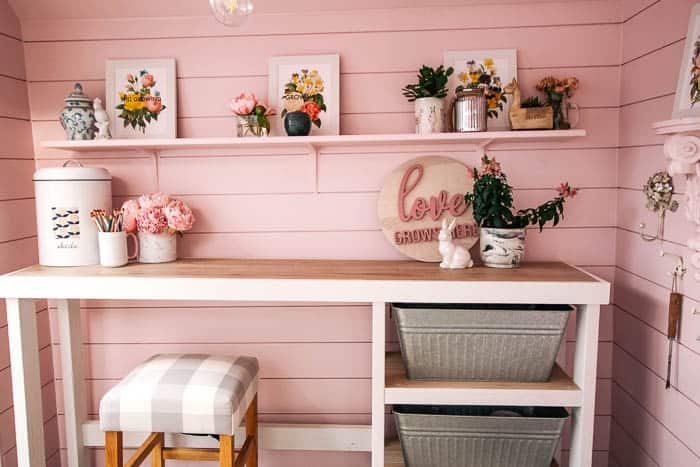
 Over the past few months, I’ve been redoing my She Shed. One thing on my wish list was a potting bench- I wanted something with storage (for the ugly gardening supplies) and also a spot where I could pull up a stool and work. Well, my husband made my dreams come true by building one for me!
It’s made out of 2×4’s and the shelves and top are left over hardwood floors from our bedroom. I LOVE it! It was custom made to fit perfectly in here. It honestly feels so sweet to have a hand made piece from my hubby. He started building me things when we were in college and I love that he is still going strong. I feel pretty lucky that I married such a handy guy.
ANYWAY, I’m the painter in the family so it was up to me to finish it off! I decided that I wanted to try for a crackle finish. Want to hear how I did it?
how to paint a crackle finish
Let’s start with the video tutorial so you get an overview on what I did. Then, I’ll dive in with more details below:
If the video doesn’t work here, you can watch it on YouTube here. P.s. I’m trying to build that page up, so if you’d subscribe, I’d really appreciate that!SUPPLIES
- crackle finish
- lemonade chalk paint
- tea rose chalk paint
- fluff chalk paint
- satin clear top coat
- paint brush
step 1
Start by painting on your first coat. I wanted a beige/orange color so I mixed a custom color with Lemonade and Tea Rose chalk paint.
With crackle paint, the first color you paint on is the color that will show through the cracks. I painted a light coat of paint, making sure to spritz my brush with water to help the paint glide across the wood.
step 2
Next, after the first coat of paint is dry, it’s time to paint on the crackle finish. This is really thick, but don’t thin it out. The thicker the coat of crackle, the bigger the cracks will be.
Note- since you’re painting on a thick finish, it can tend to drip. Make sure after it’s dried 15-20 minutes to clean up any drips that might have formed before they’re permanent. Second note- I went through crackle finish quickly since it’s applied so thickly. I used a whole 8 oz. container for this project.
step 3

And now, paint on the top coat of paint. This will be what’ll primarily show. Apply the paint thinly. As the paint dries, the crackle appears.
If you accidentally go over an area twice with the top paint, that’s ok! The crackle will still show through (though maybe a little lighter). So if your crackles are too bold, give it another coat of the paint.
If you missed a section with the crackle paint, you’ll have to go back to the first step and start over again. Don’t miss the crackle finish 🙂
Finish by sealing the piece after the paint is dry (usually 24 hours). I suggest a clear top coat to protect everything.
after
Ta da! Here is the potting bench in place! The crackle is subtle in pictures, but in person it has a really sweet shabby chic/vintage vibe that I love!
We specifically built a narrow piece to fit in this tiny room. The shelves perfectly fit the galvanized bins that act as drawers. One bin is full of potting soil, one has empty pots, and the last one has gloves and other gardening supplies.
I now have a nice place to work! I’ll be using this as a potting shed, but like that I now have a nice “desk” area too. I am thinking about maybe skirting the shelf area to soften this area a bit- what do you think?
counter stool
Did you notice the cute counter stool I have at the bench? It’s from Home Pop Furniture and is SO cute! I am obsessed with the grey buffalo check finish! And the warm brown finish on the legs is perfect in here. 
The beauty of this piece is that it is comfy in addition to being cute. If you need some good counter stools in your life, they are nice and affordable too! Here’s the link for it (plus it’s on sale right now!).

I’d love to hear your thoughts on the latest addition to the she shed! And what are your thoughts on skirting the potting bench shelves- yay or nay? Let me know in the comments!
 This post contains some affiliate links for your convenience. Click here to read my full disclosure policy.
If you love it, pin it!

No skirting IMHO I like that everything is showing
I agree, I like seeing the metal “drawers!”
It all looks great.
Thank you! I don’t mind seeing the drawers either 🙂
Thanks Lori! I appreciate your opinion!
I think it looks great without skirting! I love how you used extra flooring for this!
Thanks Racheal! You’re so sweet- don’t you just love using what you have on hand?!