
5 weeks ago, I talked my husband into building me garden beds as his Mother’s Day gift to me. Well, he made them and we planted everything in time for it to be a great gift! But it wasn’t until today that I put the finishing touches on them. Honestly, I love these DIY garden beds and am SO glad we got them in early this year so we can enjoy them through the fall and for many years to come.
The first year we bought this house, I put a garden in the ground in another location. A few things grew, but mostly it was a fail. Last year I didn’t do a garden since we didn’t get to this house after spending the winter in Florida until June. At that point, it felt too late.
All that to say, having a successful garden now feels so great! And I love tending to it! Want to hear how we made it?
how to make DIY garden beds
Let’s start with the video tutorial so you get an overview on what I did. Then, I’ll dive in with more details below:
If the video doesn’t work here, you can watch it on YouTube here. It’d mean so much if you’d watch the video! I’m trying to get better at my video skills so I can grow my YouTube channel. If you have a few minutes to watch this and/or subscribe, I’d so appreciate it.
SUPPLIES

- 3 Quantity-2 in. x 10 in. x 16 ft pressure treated lumber
- 1 Quantity- 2 in. x 10 in. x 8 ft pressure treated lumber
- 4 Quantity- 2 in x 4 in x 6 ft lath boards
- 3 Cedar Fence Pickets
- 1 Quart of White Stain
- 3 Wood appliques
These supplies are to make 3 garden planter beds. The final measurements are 36″ L x 27″ W x 20″ H.

step 1

Start by finding a good place for the garden. The biggest key factor is that it gets at least six hours of sunlight daily. Having access to water nearby is important as well. I choose in front of my son’s playhouse. It followed that criteria and I thought it’d look cute!

For this project, we re-used wood from garden beds that had been in the yard when we moved in three years ago! I love that we’re finally putting these to use. And with lumber prices going up recently, this saved us $100!
step 2

Next, cut the wood.
- start with cutting 12 pieces of 36″ long pieces of the 10″ wide pressure treated wood
- next, cut 12 pieces of 24″ long pieces of the 10″ wide pressure treated wood
- cut 6 pieces of 18″ long pieces of the fence pickets
Part of the beauty of this project is that it is really simple! Straight cuts and then screws to assemble.

Pre-drill holes on both sides of the 36″ wide boards. Then, simply screw them into the 24″ wide boards.

And tada! You have a planter box (or the start of one). Repeat this step 6 times. You’ll need all 6 to create three DIY garden beds.
step 3

And now, stack two garden beds together. I liked having a height of 20″ because it is higher and easier to tend to the veggies.
I debated leaving them shorter with only one high and having more space to garden, but knew that going taller would look prettier. And for the long term, I wanted these exactly how I envisioned. I want to keep using these for many years to come so might as well do it right once!

To connect the two garden boxes into one taller one, I used fence pickets cut down (mostly because they’re affordable and will do well outside). These were screwed on the inside of the garden beds. This gives the bed some nice stabilization.
step 4

Finally, it’s time to fill the planter boxes with soil. I decided to follow the Square Foot Gardening method. I liked it because you can garden a variety of veggies in less space, it uses less water to grow them, there is no weeding (!!!), and you don’t have to till the soil. Plus, once you mix the soil, you can use it over and over again year after year.
What I did was use “Mel’s mix” and combined 1/3 peat moss, 1/3 vermiculite and 1/3 compost. This is a tested and true mixture and it’s been working great for me so far!
Then, I cut pieces of lath boards and put them in a grid on top of the soil. It’s just sitting on there, but it gives each plant boundaries to each have a square foot to grow. Then, we planted our garden-

I only choose items we’d eat and use for our meals. Note, I spent about $100 on soil and $100 on plants. The good news is that most of the cost comes in the first year, after that it’s just plants that need to be purchased again.
Since we had the wood on hand, this project cost us $200. If we wouldn’t have had it, it would been closer to $325.
step 5
Above, the garden beds looked ok, but were a little rustic for my style. I decided to stain the beds white.

Stain will let the wood breath better than paint and should last longer.

I also added little wood appliqués to the front for some decoration. That little touch of detail makes me happy!


Last, I created some little vintage seed art seed planters for the garden. I just printed them on card stock and put packing over them so they’d survive the elements outside. Then, I used packing tape to attach them to a popsicle stick or the original plant marker that came with the plant. I think they’re a cute touch to the beds!
I spent forever searching for vintage seed packet art so I thought I’d share the art with you if you’d like to make these simple plant markers.
There is art for squash, strawberries, radish, potatoes, carrots, beets, beans, yellow peppers, Swiss chard, egg plant, blackberries, grapes, broccoli, cauliflower, cucumber, pepper, lettuce, onion, peas, pumpkin, pepper, tomato, romaine, and watermelon.

To download the free printable, just put your name and email in the form below. You’ll get an email right away with how to download. Plus you’ll be subscribed to my newsletter! If you’re already subscribed, go here to download.
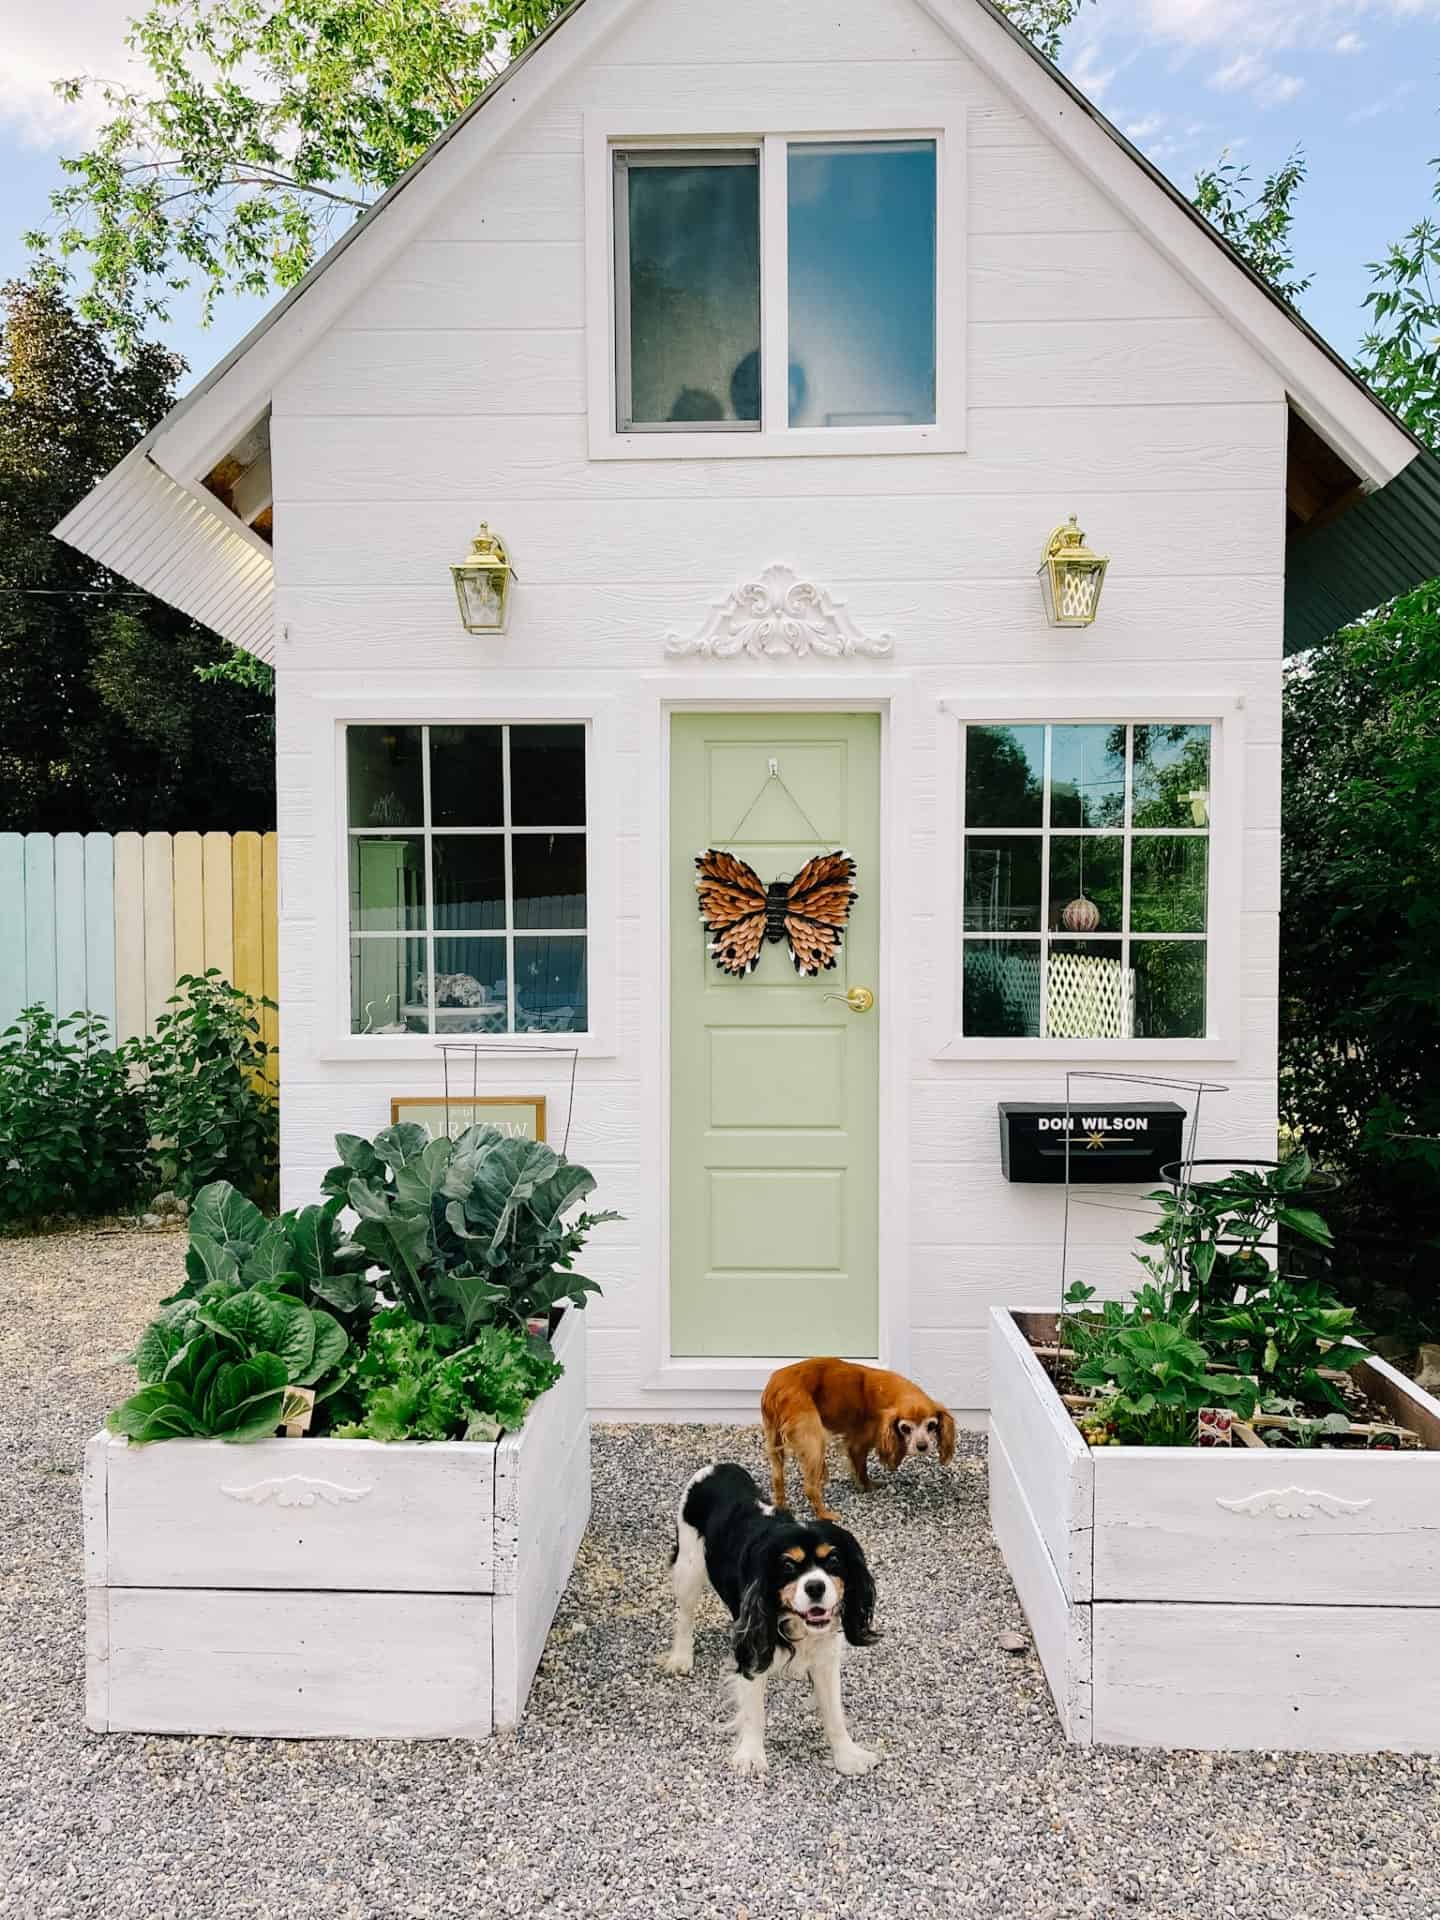
after

And here’s my pretty garden beds now! Aren’t they so great?! The veggies have done SO well. It’s one of the highlights of my day to wake up and go down and water everything.

My son likes to pick the strawberries, wash them off, and share them. I think it’s important for kids to see how food is grown. There’s so many little teaching opportunities with gardens!

I found that beautiful butterfly wreath at Joann in the spring section for 75% off. Price wise, I think I spent $4 on it. I can’t find it online, but I LOVE the whimsy it adds. Isn’t a butterfly the perfect touch for a garden?!


It was fun comparing these pictures to when the veggies were just planted to see how much they’ve grown over that last 4 weeks!

There’s my Mother’s Day present and the easiest DIY garden beds. It’s been such a joy to have a garden this year! It’ll be interesting to see what works well and what doesn’t. For example, I’ve heard that pumpkins in a raised bed might not have been a good idea.
But I’m happy to learn and tweak things next year. Overall, I’m thrilled with the outcome so far!
 This post contains some affiliate links for your convenience. Click here to read my full disclosure policy.
If you love it, pin it!

DIY Garden Beds

How to make raised diy garden beds that are easy. A step by step tutorial for how to build these from wood for small backyard vegetable gardens
Materials
Instructions
Start by finding a good place for the garden. The biggest key factor is that it gets at least six hours of sunlight daily. Having access to water nearby is important as well.
Next, cut the wood.
cut 12 pieces of 36″ long pieces of the 10″ wide pressure treated wood
cut 12 pieces of 24″ long pieces of the 10″ wide pressure treated wood
cut 6 pieces of 18″ long pieces of the fence pickets
Pre-drill holes on both sides of the 36″ wide boards.
Then, simply screw them into the 24″ wide boards. And tada! You have a planter box (or the start of one). Repeat this step 6 times. You’ll need all 6 to create three DIY garden beds.
And now, stack two garden beds together. I liked having a height of 20″ because it is higher and easier to tend to the veggies.
To connect the two garden boxes into one taller one, use fence pickets cut down (mostly because they’re affordable and will do well outside). These are screwed on the inside of the garden beds. This gives the bed some nice stabilization.
Finally, it’s time to fill the planter boxes with soil. What I did was use “Mel’s mix” and combined 1/3 peat moss, 1/3 vermiculite and 1/3 compost. This is a tested and true mixture.
Then, I cut pieces of lath boards and put them in a grid on top of the soil. They're just sitting above the dirt, but it gives each plant boundaries to each have a square foot to grow.
Next, stain the wood with white stain (or whatever color you'd like).
I also added little wood appliqués to the front for some decoration. That little touch of detail makes me happy!
Last, plant the garden with fruits, vegetables, or flowers.
Enjoy your beautiful DIY garden beds! 
The link is gone for the planter signs.