Halloween passed and I’m still not ready for Christmas decor. So here I am, making little rainbow turkeys. This year we’ll spend Thanksgiving in Florida and it’ll probably be just our little family. I’m guessing lots of people will have smaller gatherings this year. Which means more time to pay attention to the special little details. One DIY rainbow turkey per place setting sounds adorable to me!
how to make a diy rainbow turkey
SUPPLIES
Wood Ovals and Circles (you could also cut out cardboard instead).
step 1
Start by cutting the doll pins so they have a flat bottom to stand on. Before I did this project, I didn’t realize you could buy stands for the pins. I linked a kit with pins and stands so that’s the best bet. But if you want a flat bottom, cutting them works too. I used a miter saw and then just had to sand afterwards.
step 2
Next, it’s time to dye the bunny tails. I love the current trend of using dried flowers for decor! I figured I could dye these rainbow colors. They could be dyed any color though. Before dying, I laid out a wood oval (which will back the bunny tails) to see how many each turkey would need. I decided 25 per turkey would be good.
I mixed food coloring with water and left the bunny tails in the food coloring for 10 minutes to get a saturated color.
After dyeing, I put the bunny tails on a paper towel to dry. Plan on 2-3 hours for drying.
For drying, after the paper towel soaks up most of the dye, it’s best to let the bunny tails dry by suspending them so that air can circulate all around them.
If you’re wanting to make these for a Thanksgiving day craft (which would be SO fun), I’d suggest dying the dried grass beforehand. The rest is pretty easy and quick to make.
step 3
And now that the rabbit tails are dry, it’s assembly time!
Use scissors to cut the majority of the stems off.
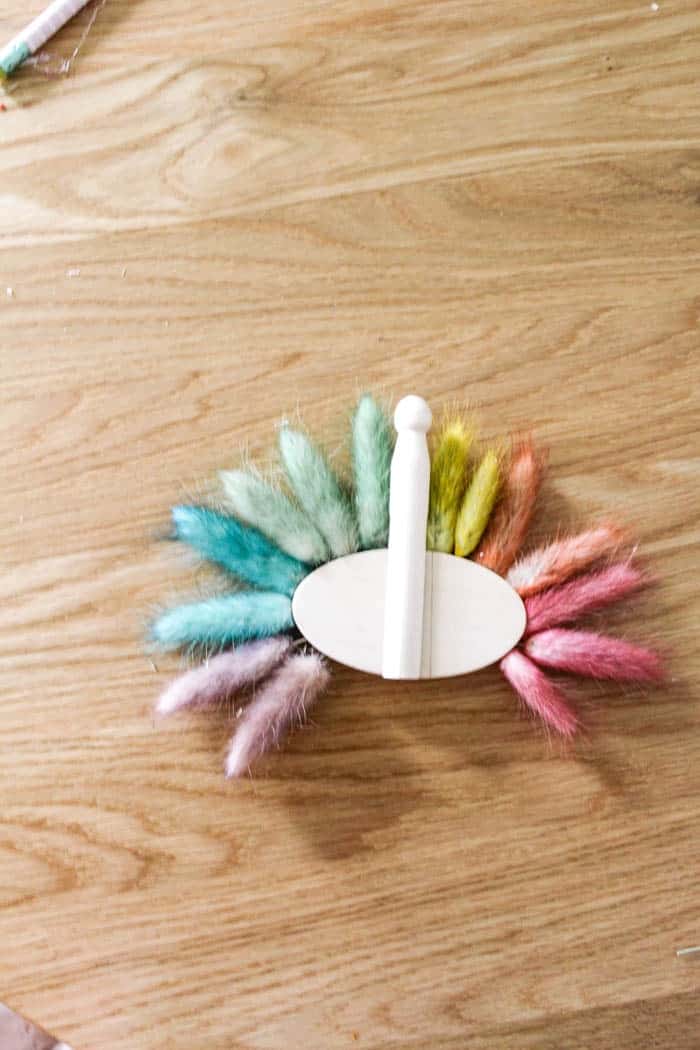
First, glue the bunny tails on the wood oval in rainbow order. The above picture is how I planned the craft, but then I thought the middle was too plain.
So I glued on more bunny tails to fill in the center. Except where the doll pin will go.
step 4
Finally, to create the face, I cut little beaks and gobbles (is that the right word- ha!) out of felt. For the beak, I cut tiny teeny yellow triangles. For the waddler (I googled it- that’s the red thing on the turkeys neck), I cut red tear drop shapes out of felt.
Then I used a hot glue gun to attach the felt pieces. For the little eyes, I dipped a sharpened pencil in black paint and use that to create eyes.
Last, I used hot glue to attach the doll pin to the oval.
after
Here’s how the little cutie turkeys turned out!
I ended up putting the turkeys in my colorful hutch with the pumpkins I painted for fall. I think they’re rather adorable. Don and I played with them a bit. He says their expression looks angry and loved playing mad turkey- ha!
Our dining table is in the living room while we renovate. Though it’s a little cramped, it is definitely feeling festive for Thanksgiving! What do you think about this colorful craft? Now that I know how to dye these, I’ll be wanting to do a bunch more projects with dyed grasses!
 This post contains some affiliate links for your convenience. Click here to read my full disclosure policy.
If you love it, pin it!


How cute are these?! SO colorful and fun. Love it. Thanks for sharing at Vintage Charm. Pinned! xo Kathleen