Did you know that you can make your own bottle brush trees? They’re an extremely popular look right now and I think they’ll continue to be. And guess how you make them? With a toilet brush! From the Dollar Store. I’m not joking! Let me show you how cute these are.
Thank you to Ryobi for sponsoring this post! All opinions are my own
how to make bottle brush trees
Let’s start with the video tutorial so you get an overview on what I did. Then, I’ll dive in with more details below:
If the video doesn’t work here, you can watch it on YouTube here. I’d be over the moon happy if you subscribed to my YouTube channel! Videos are actually released on YouTube first (usually the night before they’re published on the blog). Thank you!
SUPPLIES
- Toilet Brush– I got mine from Dollar Tree for $1.25 each. You can also find these exact brushes on eBay here
- Spray Paint- Candy Pink, Real Orange, Almond, Lemongrass, Green Apple, Ocean Mist, and French Lilac
- 1″x3″ board– this makes the base
tools
I spent $10 on 8 toilet brushes (which is a funny thing to type out- lol) and $28 on 6 colors of spray paint. I had the wood and tools on hand so I spent $38 on this project to make 16 bottle brush trees. That’s $2.38 per tree. Not too shabby!
step 1- cut the wire
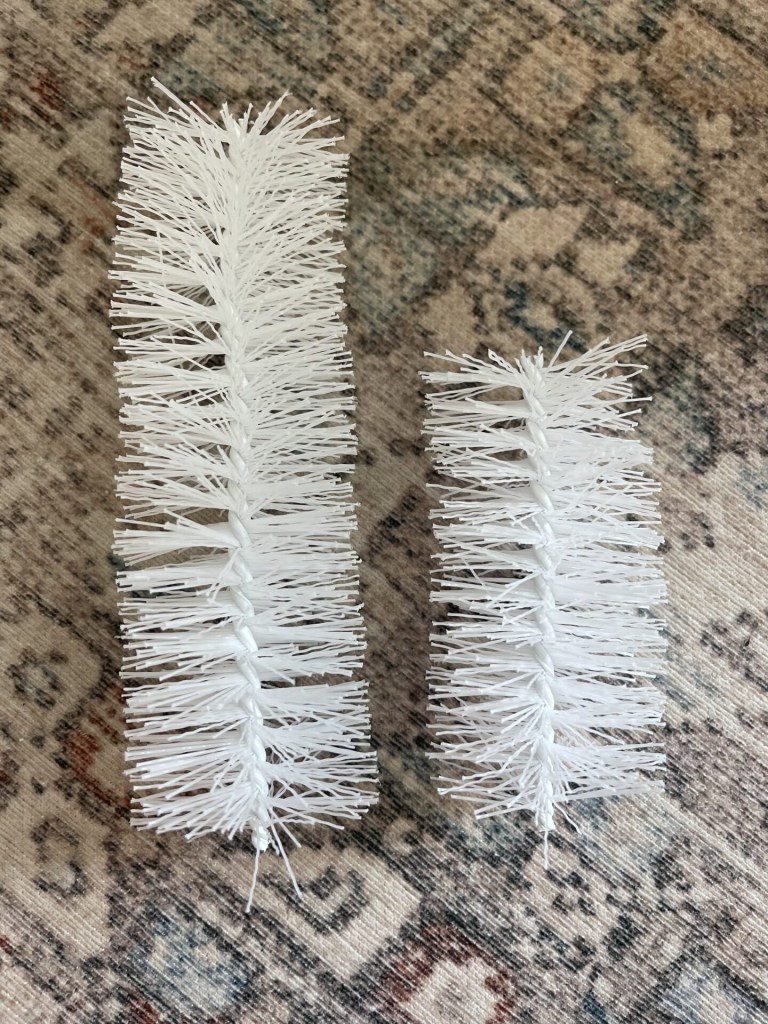
Start by cutting the wire off the plastic end of the toilet brush. The handle is no longer needed.
Then straighten the wire. This will give you one 10″ long piece. I cut the bottle brush into two shorter lengths- a tall and a short pieces. I wasn’t super precise about cutting the tree heights so it could look like a forest.
step 2- make the base
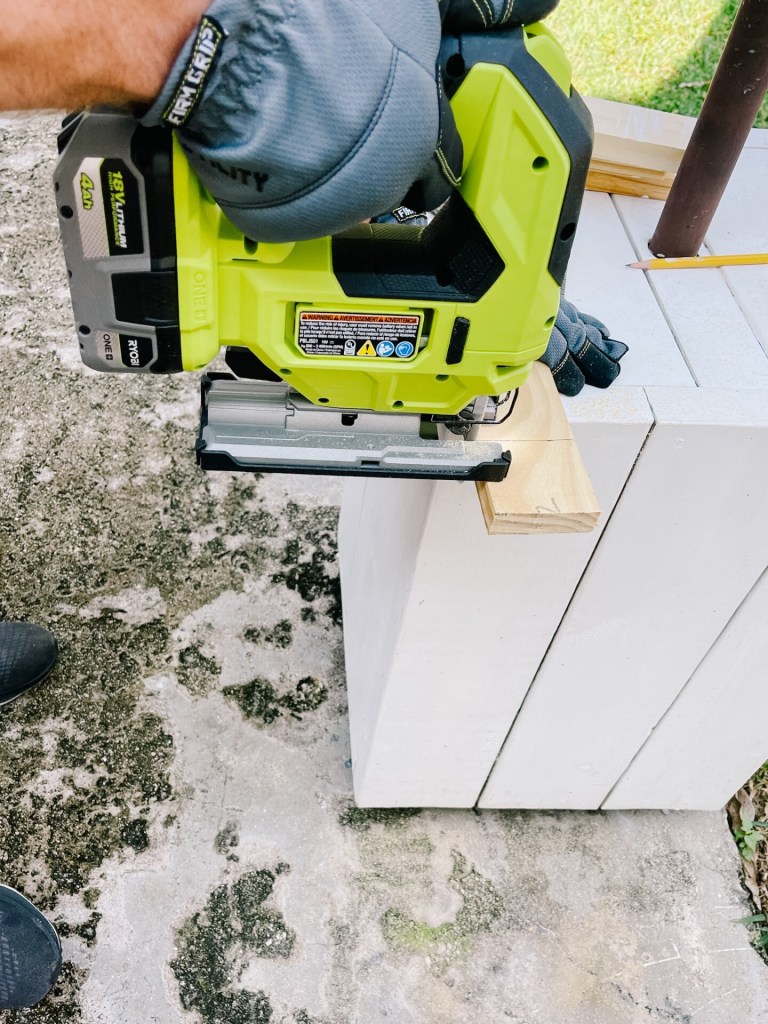
Next, cut the base with a saw to get square pieces in the measurement of 2 1/2″ x 2 1/2″. I used a jig saw- this is a great DIY beginner tool. It’s easy to use and you can create so many projects with it! I love that this saw is cordless- not worrying about the cord streamlines the process.
If I was to suggest a line of tools for a creator, I’d definitely say the RYOBI Tools. The batteries can work between any of the tools. Plus they’re affordable while being great quality. I thought this post would be a good way to showcase some great basic tools that get tons of use at my house.
For the base, find the center of the board by drawing with a speed square from one corner to another.
Then, drill a hole in the base 3/4 of the way through. Add tape to the end of the drill bit so you can easily know how far down to drill.
To find the right spot for the tape on the drill bit, we held up the bit to the wood base and marked it with painter’s tape where we wanted the drill bit to stop.
Sand down the rough stops of the wood base.
For these steps, I used an orbital sander and impact drill. These are two more tools I’d suggest to anyone wanting to get more into DIY. The impact drill is more powerful than a standard drill so I find it easier to use. Every DIYer needs a good sander to create professional looking projects.
step 3- shape the tree
And now, double check that all the brush wires are straight. I went through and straightened each one by hand.
Next, use scissors to trim into the shape of a tree. I started at the top by cutting the top brush pretty much to the wire. I cut the brush on an angle from the middle to the top.
Hot glue the brush into the wood base. Also, if any brush pieces are falling out, hot glue the branches so they stay on the wire.
At this point I was really excited because the little trees looked so nice! These look adorable as white little trees.
For this step, I used my newest tool- a cordless hot glue gun by Ryobi! I love how compact this is and that I can glue anywhere since I don’t need the glue gun to be plugged in. The battery goes on the base and when the gun is sitting on the base, it heats up. This is a game changer for crafters! This is my favorite new tool and I’d suggest it to anyone.
step 4- add color
Since I’m a color lover, I decided to spray paint my bottle brush trees. I gave them all one coat of paint, let them dry, and then added a second coat of spray paint. For the orange tree, I didn’t love how bright the paint looked, so I added a coral chalk paint to tone it down.
Note, the brushes for the project are made of plastic so paint is the only way these would take color. I have this blog post about how to dye and change the color on bottle brush trees for more ideas.
after
I must say, I was pleasantly surprised at how cute these turned out! I started the morning not being sure if I’d be able to find the brushes I’d need. And ending the day with some super cute bottle brush trees!
These could be made in so many color variations. And if you have paint on hand, this would be even more affordable than $2.38 each. Most bottle brush trees bought in store are $5 each at the cheapest so these are a great deal!
Anyway, I am a fan and so happy with how these came out. This is my first bit of Christmas decor in my Florida house and it feels so nice to have these out and looking festive!
I hope you enjoyed this tutorial for how to make bottle brush trees. Can you believe these started out as a toilet brush?! Let me know. if you have any questions is the comments.
 This post contains some affiliate links for your convenience. Click here to read my full disclosure policy.
If you love it, pin it!


