Let’s be honest- I’ve painted laminate furniture before and followed tutorials that promised a flawless result and I’ve still had issues with the paint coming off when scratched. So when my mom asked me to paint her laminated desk I was a little hesitant. Let’s look at a before picture:
Its not bad right?! I actually adore this little desk. But it is 10 years old and there were a TON of scratches and banged up areas. Here’s a close-up:

Since I was nervous about the paint not sticking, I did a little research and figured out a new method that I haven’t tried before. And spoiler alert, the paint is sticking like a champ! Let’s jump into the tutorial!
supplies
- Paint Brush
- chalk paint of color (I used Dixie Belle Fluff White Chalk Paint)
- Dixie Belle Clear Coat in Satin
- wrapping paper (for the back of the hutch)

how to paint laminate furniture
Ok, you’re going to laugh, but my trick to painting laminate furniture so the paint stays is just as simple as using chalk paint! I’m not kidding- I didn’t sand or anything. I started by cleaning the desk and hutch really well. Then I jumped right in with the first coat of chalk paint. I painted the desk white per my mom’s request, so its not a huge difference (besides the scratches being gone).
For really shiny laminate, I would suggest priming with slick stick to make sure the paint doesn’t scratch off.


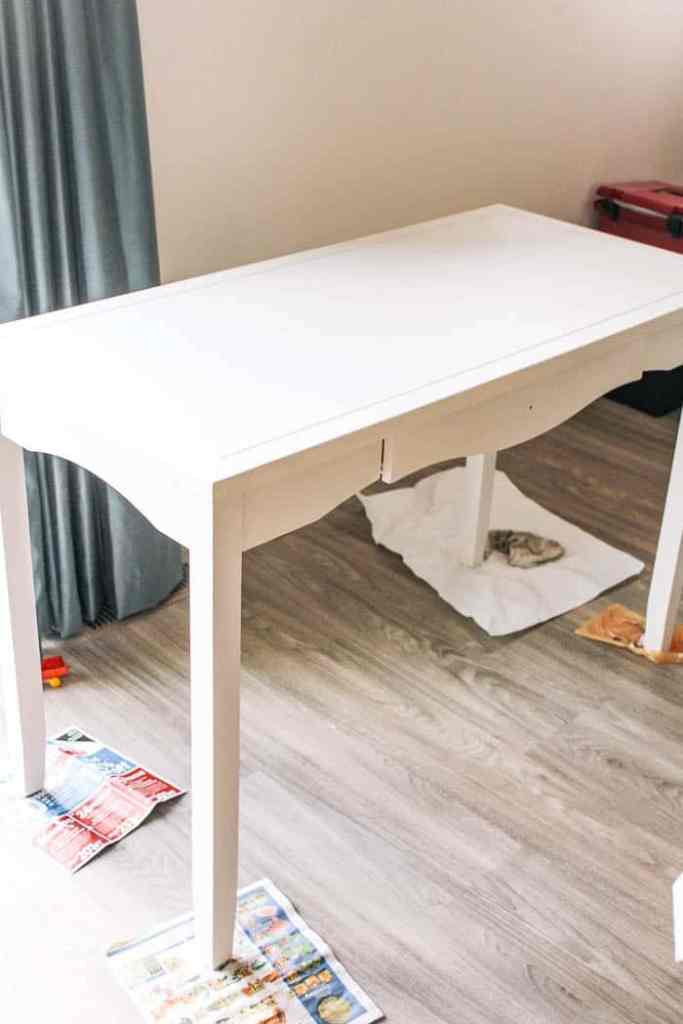
I ended up doing 4 full coats of paint before I was happy with the coverage. I then went over the chalk paint with 2 thin clear coats. After everything was dried, I found a few hard to see areas and did the scratch test (aka I tried my best to use my nails to mark up the paint). Guys, we are good to go! The paint looks flawless and I think it’ll stand up to 10 more years of use.
wrapping paper
I’m a girl who loves pattern, so I decided that since the hutch and desk stayed the same color, I could spice things up by putting some wrapping paper on the back of the hutch! I cut the pieces to size and used a glue stick to secure it. This certainly isn’t permanent, but it’ll be fun while it lasts.
The wrapping paper wasn’t quite wide enough for the top and the bottom, so there are a few seams. I made sure to match the pattern so those aren’t noticeable.
after
I love how this cute little desk turned out! I couldn’t help myself and redid the styling. My mom has the most beautiful blue and white China set so I used a few pieces in here.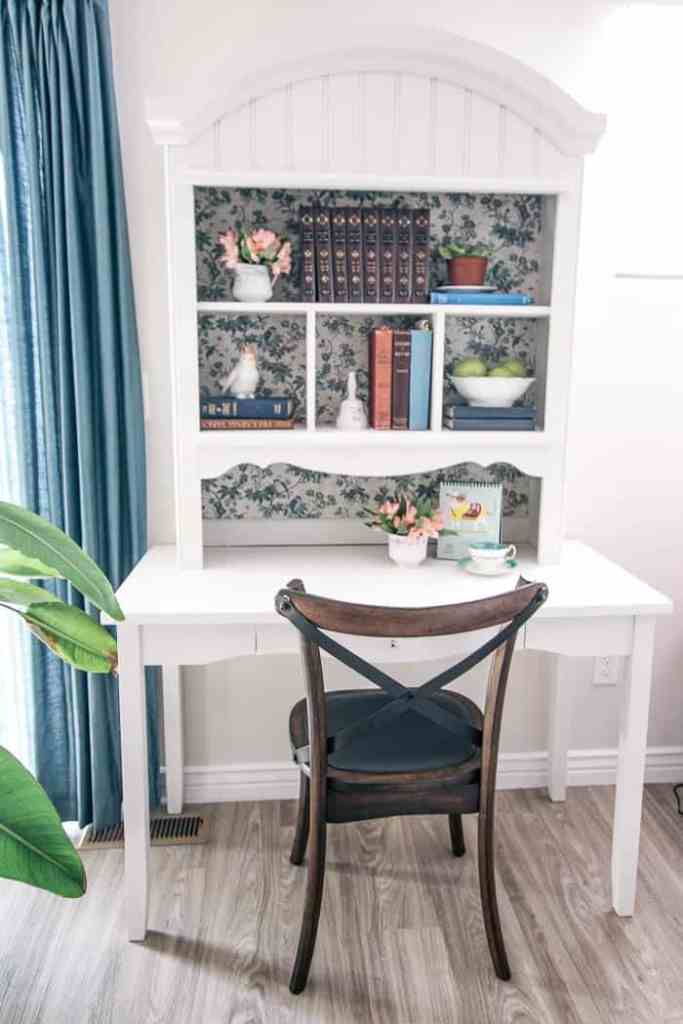

I bought my mom a sweet bird to coordinate with the wrapping paper. The paper backing matches her sofas and drapes so I was really excited to use it!

And, of course, I threw in some pink flowers! My mom is actually a pink lover (that’s where I got it from, I’m sure).
What I love about this DIY is that it is so simple! It was a really affordable way to give new life to an old piece of furniture. I’m sure that chalk paint will work as well on Ikea furniture too! Or even a laminated piece from the thrift store. It took me a few hours to do, but it was definitely less expensive than going out and buying a new piece.

I hope this tutorial was helpful to you! Happy decorating!
 This post contains some affiliate links for your convenience. Click here to read my full disclosure policy.
Want to remember this? Pin this to your favorite Pinterest board!
This desk turned out so cute! The wallpaper is my favorite part 🙂