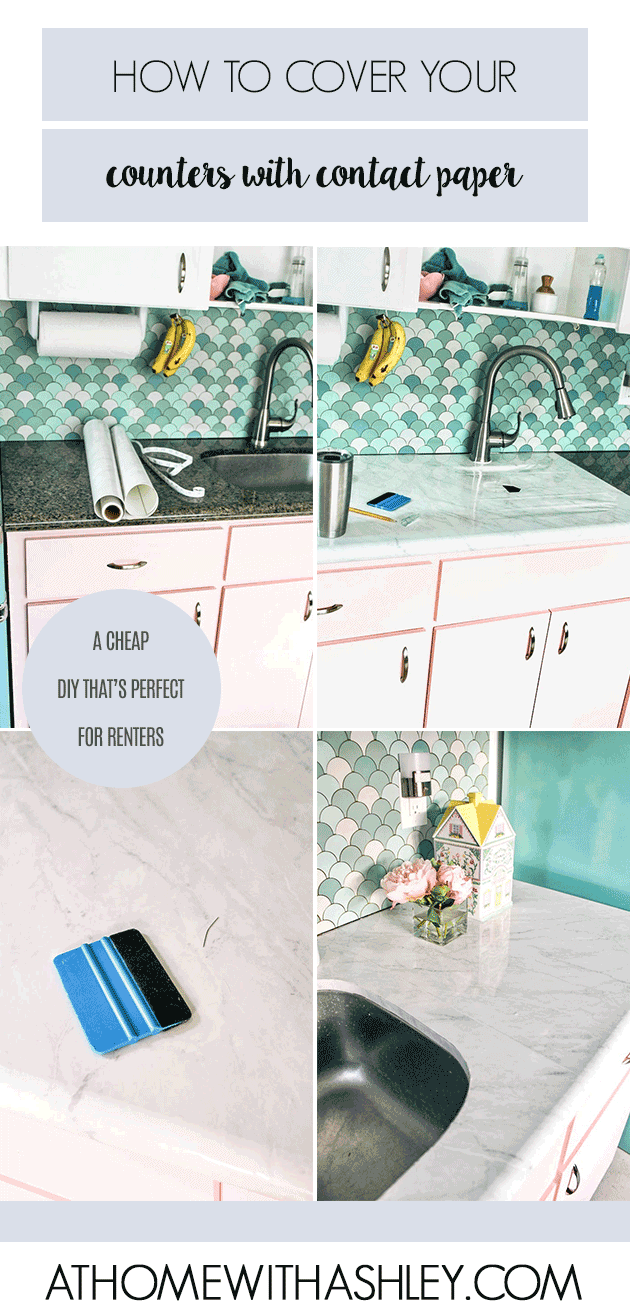
Last week I gave my kitchen a refresh with painting the cabinets and putting up a contact paper backsplash. I’m not quite ready for a remodel, so I’m doing budget friendly fixes that’ll make it more pretty for now. The biggest issue was my dark brown granite counters. Since I wanted a lighter look, I went for grey marble contact paper for countertops. Want to see the DIY?!
contact paper for countertops
Who is this project good for? Contact paper for countertops are a great project if you have counter tops that you don’t like, that are old, or just boring. If you’re not ready to totally change out the counters- maybe because of time or budget reasons or if you rent, this is a the perfect solution!
SUPPLIES

- Marble contact paper for counter tops
- Wallpaper smoothing kit (includes an exact-o knife, smoothing tool, and a flexible measuring tape)

Above I Iinked to the contact paper I bought. When I got it a few weeks ago, it was listed for $23 for one roll. I wanted to share a few other options-

1 marble (what I used) / 2 light wood / 3 pink marble / 4 terrazzo / 5 rose gold marble / 6 grey marble * / 7 beige marble / 8 grey granite * / 9 oak wood *
Want to avoid seams? *** I marked the contact papers that are 26″ wide with an asterisk. Counters are 24″ wide so a 26″ piece of contact paper should cover the top and the lip of the countertop. This will give a much more polished look.
I wish I would have ordered a wider one! Mine was 24″ wide so If I would have run the contact paper side to side, the front of the counters would have still been brown.
step 1- clean

Start by cleaning the countertops really well. I used a rag and all purpose cleaner. You want to make sure to remove any crumbs or oil- both of these can make the countertop bubble when applying it.
step 2- cut
Next, cut the piece of contact paper. I was working with the left side of the countertop and worked right. I used a fabric measuring tape to measure the counter top (including the bull nose). Note, it’s better to have a little extra instead of too little.

Mark the back of the contact paper with a pencil, draw a straight line, and cut on the line with scissors. The back of my contact paper had registration marks which made it easier to keep the line straight.
step 3- apply
And now, it’s almost time to put on the contact paper! One tip I’d share is to cut a small piece of backing off the contact paper. This makes it so you have a small sticky area. I’ve found this helps when getting the first piece placed. Put that little sticky part down and then start pulling the rest of the backing off.

Another tip I have is to WORK SLOW! This is similar to applying wallpaper, but the tendency to get bubbles is MUCH higher. I found the most success by pulling off 1/4″ of backing at a time and smoothing with the wallpaper smoother tool (use the felted side).

Keep smoothing out the contact until you’re over the front lip of the counter top. Since my counter has a bull nose, this was especially tricky to get to lay flat. My contact paper was a little long, so I had to use an exact-o knife to trim it.

step 4- going around the faucet

I was worried about going around the faucet and sink. I tried to take it slow and be meticulous with this step. To go around the faucet, I cut a line and a circle- so there’s a seam behind the faucet. I trimmed out the circle and kept trimming until I had a good fit.
Remember, it’s better to start by not cutting enough of the contact paper and having to trim more than making an error.

Once I had the faucet hole good to go, I cut a hole for the sink opening with scissors. This would later allow me to easily cut out the excess contact paper.

I got the contact paper applied. This took awhile because I was going around so many areas while lining up the seam.

I finished the sink by cutting out around the top of the counter top. There was still brown granite showing, so I cut small strips and laid them around the edge. Honestly, this part looks a little janky and I’m worried about it staying on. If I was to do this again, I’d try to fold over the contact paper and smooth down around the sink.
step 5

Finally, finish by smoothing and using a pin on any bubbles. You can also try using a hair dryer to get out the bubbles.
after

Ta da! Here’s the new faux marble countertops! Honestly, I love them!


They’re not perfect yet- I need to do something about the dark line between the backsplash and counters. I’m thinking about ordering this Instatrim that’s sticky (but I think I can remove it later when I renovate and want to sell or donate the granite)

I’m also not happy with the sink area. One reader suggested buying white Gorilla tape for the edge.
faq about contact paper for countertops
I wanted to answer a few questions I’ve received about this project.
how durable is contact paper on countertops? Will it hold up to water?
From everything I’ve read, these should be durable. I will NOT be cutting on these- I always use a cutting board anyway. I also will NOT be putting a hot pan directly on the contact paper.
For the water, I’ve heard it’s very durable even from water. They are plastic so I’m hoping they’ll do well. There is a seam super close to the left side of the sink. That’s the part I’m most worried about wearing well.
You can also caulk along the faucet and where the counter hits the backsplash to make it more durable.
how do you clean these?
I’ll continue using multi purpose cleaner and a rag or Clorox wipes. I’ll keep you updated with how they hold up to routine cleaning. We eat pretty much every meal at home so these will be used.
how do you remove contact paper from countertops?
You just pull it off. It’s stuck on there really well, but once you get a corner pulled up, it just takes some muscle to pull it up.
can we see the seams? How noticeable are they?

Here’s one seam and some bubbles. They’re somewhat noticeable. That’s why I’d suggest a wider contact paper. Though, it would be WAY trickier going around the faucet if I’d done one big piece.
do you have a video of this?
I saved the video of me installing these countertops on my Instagram. You can see them under this highlight.
is there a repeating pattern or do you just lay it as is?
There isn’t a repeating pattern. It’s kind of random. So you can just lay it down and not worry about matching the pattern.
DID YOU DO THE EDGE AGAINST THE FRIDGE?
No. I needed that strip to use around the sink. I barely had enough or I would have. I don’t think folding it over would have been that hard.
how long did this take you to do?
This took me 2 and a half hours to install. I did spend a bunch of time taking pictures and doing Instagram stories though.
BEFORE

AFTER
I hope that answers all your questions! If I missed anything, please leave a comment and I’m happy to answer!
 This post contains some affiliate links for your convenience. Click here to read my full disclosure policy.
If you love it, pin it!