 I LOVE the layered doormat look. I’ve been wanting to add one to the outside of my She Shed, but I didn’t want to spend a lot of money on a rug. So, I thought to myself, maybe I can make one! I searched on Pinterest and found out that canvas drop cloths from the hardware store make for great rugs! That sounded perfect so I grabbed an $8 one. Here’s how to make a DIY drop cloth rug.
how to make a diy drop cloth rug
Let’s start with the video tutorial so you get an overview on what I did. Then, I’ll dive in with more details below:
If the video doesn’t work here, you can watch it on YouTube here. P.s. I’m trying to build that page up, so if you’d subscribe, I’d really appreciate that!SUPPLIES
- 5’x5′ Drop Cloth from Home Depot or Amazon
- Painter’s Tape
- Paint-1. Beloved Pink, 2. Shy Smile, 3. Ballet Rose, 4. Coral Fountain, 5. Lamplit, 6. Corn Stalk, 7. Frittata, 8. Frosted Sage, 9. Spring Reflection, 10. Country Weekend, 11. Serene Breeze, 12. Casade Green 13. Watery
step 1
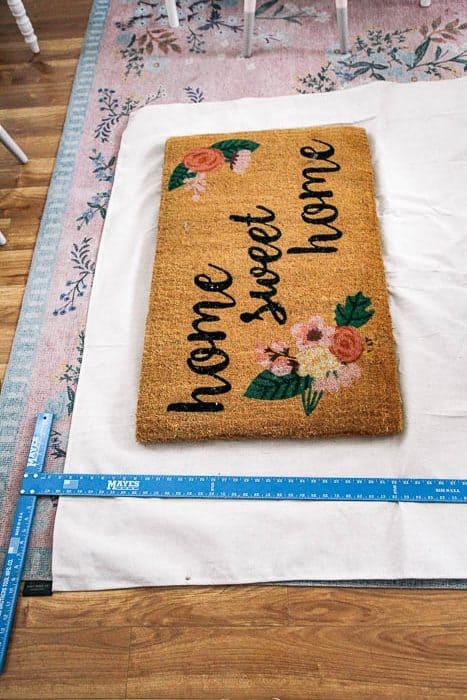
Start by laying out your canvas drop cloth. I bought a 5’x5′ one, but knew I’d need to cut it down to fit under my doormat. If you want a rug for your room, you can buy bigger sizes and can skip the steps of cutting it down and hemming it. I put my doormat on top and decided on a 54″ x 40″ drop cloth rug. I used a measuring tape and straight edge to mark with a pencil where I’d cut.

Then, I just used scissors to cut the drop cloth where I marked.

step 2
Next, it was sewing time! I folded the edge over and hemmed the two edges I cut. If you don’t have a sewing machine or prefer not to sew, use hem tape and an iron for this step.
After the sewing was done, I laid down drop cloths on the floor to protect it when painting. It definitely feels silly to put a drop cloth under a drop cloth, but for me, the edges did get painted so it was worth it. Once the drop cloths are down, give the top drop cloth an iron (so you can easily paint it. Plus projects always look better ironed 🙂 ).

Finally, I used painter’s tape and taped off stripes. I used the painter’s tape as spacers so that my lines were even (you can see how in my video). Make sure to push down on the edges so you don’t get bleeds.
step 3
And now, it’s painting time!!! The canvas really soaks in the paint to be prepared to really layer it on. I had latex wall paint leftover from my stairs, so I used that. You could also use craft paint or fabric paint.
After you’re done painting, remove the tape. If the paint is still wet, be careful to keep the rug flat so you don’t smear the paint.

Finally, I finished the rug off by sewing on some tassels I’d made awhile ago on the ends. They ended up being perfect for this project!
after
Ta da! I took the rug outside and put it next to my newly finished rainbow fence. How cute does it look here?!

Here’s the rug without anything on top of it. Isn’t it fun?! I definitely think it can stand on it’s own!
What I love about this project is that I was able to spend $8 on a drop cloth and use materials I had on hand to make a rug! I really appreciate that it is customized to my decor and looks pretty adorable out here! Is this a project you’d try? Any questions on it? Let me know in the comments!
 This post contains some affiliate links for your convenience. Click here to read my full disclosure policy.
If you love it, pin it!

[…] p.s. Sich über diesen süßen Teppich wundern? Im DIY-Tutorial erfahren Sie, wie Sie ein erstellen Teppich aus einem Falltuch hier. […]