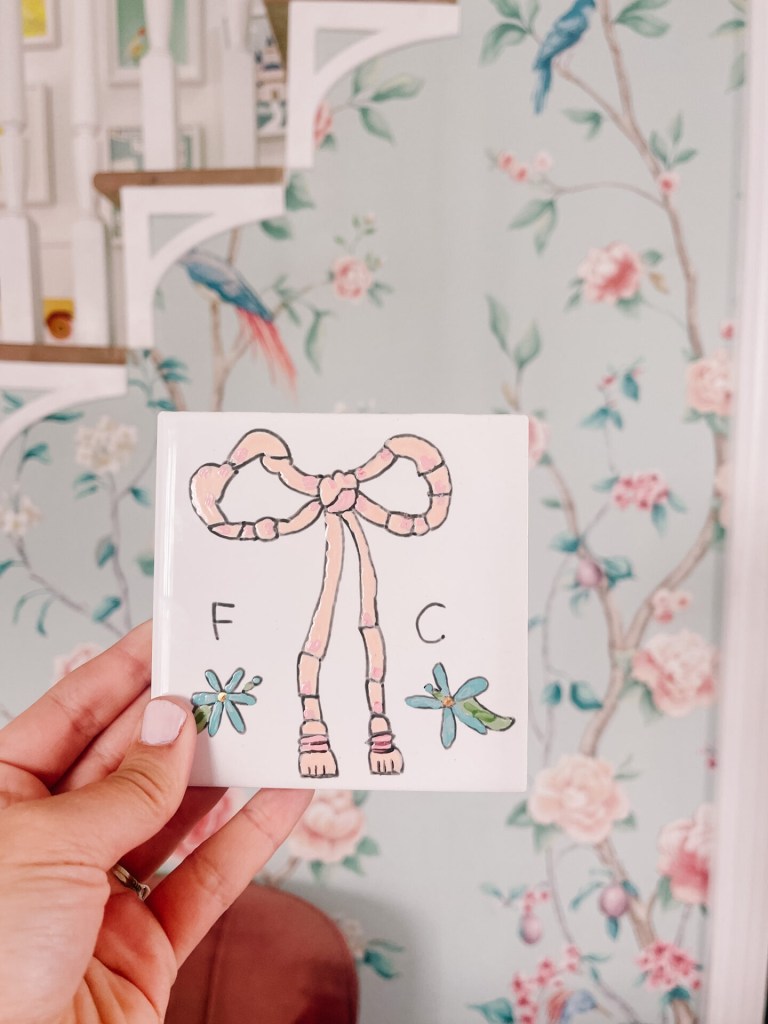
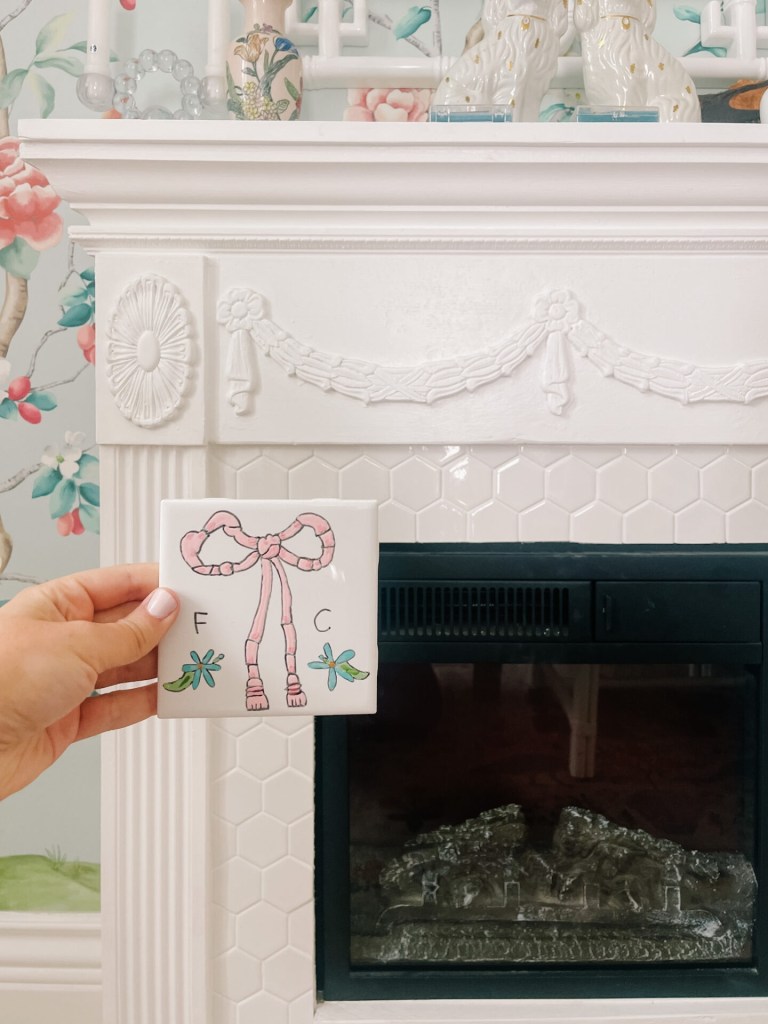
I’m currently redoing my main bedroom and I have a DIY fireplace planned. For that I’ve been wanting patterned tile. I couldn’t find anything affordable, so I thought I could make my own! After brainstorming a bunch of ideas, I thought of a way to make a durable and beautiful finish that’s tried and true. Ready to see how to make DIY hand painted tiles?!
how to make diy hand painted tiles
Let’s start with the video tutorial so you get an overview on what I did. Then, I’ll dive in with more details below:
If the video doesn’t work here, you can watch it on YouTube here. I’d be so grateful if you subscribed to my YouTube channel! Videos are actually released on YouTube first (usually the night before they’re published on the blog). Thank you!
durability
Five years ago I painted my own dishes. I used porcelain paint and then baked them in the oven to set the paint. I love how they turned out! They’ve been our daily dishes for all five years and have been washed in the dishwasher multiple times a week. And it’s held up great!
So I figured that I could use the same method for the DIY hand painted tiles! Since it’ll be on the fireplace surround, it’ll get barely any wear (certainly less than a dish that’s washed all the time) and should be very durable.
SUPPLIES
- 4×4 Tiles
- Porcelain Paint Kit (I also used the color Tender Pink). Here’s another paint option for ceramic or glass
- Note, out of the kit I used the colors- gold, sapphire blue, amber brown, black, ivory, peridot green, and red
- Fine Tip Porcelain Marker in Black
- Paint Thinner for the Porcelain Paint
- Artist Paint Brushes
- Rubbing Alcohol
Tools-
- Oven to bake the painted tiles
price breakdown
For this project I bought a case of 100 tiles which cost $16. I ended up returning the extras- I only used 30 and they cost $0.16 each for a total of $4.80. The tile paint was the most expensive part- $53.63 for the kit of tile and $9.01 for the marker. I already had the pink paint on hand from when I painted the dishes in 2018 and it was still good!
The grand total I spent on this project is $67.44. That comes to $2.25 per tile.
Note, I looked hard at buying patterned tile for this project. The best price I could find was $38 for 4 tiles (which comes to $9.50 per tile). I’ll link the affordable patterned tile I found is you don’t want to diy this project. Just click the image to shop.
inspiration
I like to create art, but I definitely need inspiration to draw from. For this project, I took pictures of the Macau pottery I own. I love the simple and beautiful hand painted flowers and decided that I could take those and create my own take on them. The pottery is vintage and since I’m not selling these, I figured it’d be find to be inspired by them.
step 1- practice
watercolor paper / travel watercolor paint / archival ink pen / water dropper / pouch
Start by practicing on paper the pattern that will later be made on the tile. I used watercolors and pen to draw out the different motifs I wanted on my tiles. Trying to be true to my house, I did a combination of flowers that can be found in my yard and birds on flowering trees. The F C on the DIY hand painted tiles stands for Fairview Cottage (the name of my house).
I practiced each image a few times before I was happy with it. By adding color with the watercolor paint I was also able to test out the color way and narrow down a color pallet.
step 2- clean the tiles
Next, use rubbing alcohol and a cotton rag to clean the tiles before painting. This will remove any dirt that could make the paint not stick.
step 3- draw on the pattern
Once the tiles are clean, start drawing on the pattern. I used the paint pen to directly draw on the tile. If I made a mistake, it was easy to use the rag and rubbing alcohol to remove the blemish. Another option is to use a crayon to draw on the tile- the crayon will actually stick (unlike pencil).
If the tile is going to have a geometric pattern, painter’s tape can be used to create a clean paint line.
For my project I need 19 tiles so I drew all of them on at once with the paint pen. It took me between 4-5 minutes to draw on the black outline. By the end, the paint pen was almost out of ink. So if you’re doing a project bigger than 20 tiles, you might need to buy a few paint pens.
To draw on the tiles, I simply looked at my practice art and then did my best to replicate it on the tile. I would measure the starting point on the paper- so if a flower was two inches down and two inches over, I started at that same point on the tile. Then I drew and tried to make it look like the practice sheet.
If I did make a mistake, I’d just scratch off the paint with my fingernail. Writing that out is gross, sorry. Or I’d use the rag with rubbing alcohol to remove the area I didn’t like.
Note, I also tested using using a paint brush with black paint for the outline. I couldn’t control my hand as easily so it was harder to get strategy lines. Plus it wasn’t any darker than the paint pens so I didn’t like that method. Though it would save money and might work for someone else with better painting skills.
I worked tile by tile until all 19 tiles that I need for my project had the outline drawn on them. I added some black details like hash marks, leaf veining, and dots in the center of flowers, but the paint ended up covering them so that was a waste of time.
step 4- add in the color
And now, use an artist paint brush and porcelain paint to paint in color on the outline. Since I wanted to custom mix most of the colors for the tiles and didn’t want them to dry out, I painted on one color at a time. I started with tender pink.
This was actually the pink paint I had bought 5 years ago. I needed to add the paint thinner a few times so it wasn’t so thick and sticky. Note, the other paint I used from the kit I bought a few days ago was a much easier consistency to use. In hind sight, I wish I’d bought new pink paint.
The pink paint was hard to work with and there is a lot of it on my tiles. Each tile took 5-7 minutes to just paint the pink on it.
After the pink, I added gold where yellow would normally go (in the center of flowers, the bird beak, and tulips). I love the metallic finish so I wanted to use as much as possible.
Next, I started mixing colors. I used white with brown to lighten it up before painting the branches.
After the brown, I moved onto the green. This part was pretty simple since it was just coloring in the lines. All that’s needed is a steady hand. To mix the green, I used peridot green with white and brown.
Once those were done, I finished the base colors with blue.
The art needed more dimension at that point so I mixed darker versions of pink (by adding red) and green (by adding more peridot green and brown). I also mixed lighter versions of the brown (with more white) and blue (by mixing in the gray from the tail feathers). Then I added some highlights and lowlights to make the art look a bit more realistic.
I was going to redo all the black outline, but it was a slow process and I didn’t actually like the black popping out more. So I stopped and let them dry.
other project ideas
While I worked on the tile, Don did some too. We did a few with markers for fun and then I let him paint with the tile paint to make his own tile. This is a great project to do with kids! The paints are the most expensive part, so using a few tiles for children isn’t a big deal. Then you could hang it on the wall or use it in a garden.
You could also buy tile coasters and create your own coaster set with this method.
step 5- bake
Finally, once all the tiles are painted, let them dry for 24 house. Once dry, bake them in the oven on 300 degrees for 35 minutes. This sets the tiles so the paint won’t scratch off. I put my tiles on a baking sheet so I didn’t break them during the process of taking them in and out of the oven.
after
And here are how the tiles look now that they’re finished! I’m so proud of how they turned out. I think the colors and motifs are so fun and happy.
Note, when I baked the tile all the colors came out the same as before baking, but the pink turned a little peach. I think that’s because it was older paint that I needed to thin out. I still love it, but I was a little surprised by the. color change.
The biggest thing I’m worried about with this project is the paint coming off when grouting. But even after the paint dried before baking, it was almost impossible to scratch the paint. After baking it is even more set and should be good. Of course, I’ll write a blog post when the fireplace is put together to keep you posted.
I’m so excited to see these in my future main bedroom! I think they’ll be really special.
I’m really proud at how these DIY hand painted tiles came together! They capture my vision and are so sweet and whimsical. What do you think? Any questions? Would you try painting your own tiles?
 This post contains some affiliate links for your convenience. Click here to read my full disclosure policy.
If you love it, pin it!


They came out amazing! Such a fun project.
This is so dreamy!! I love this idea!! Another great money saving DIY from Ashley
You’re so creative! This was a great idea… awesome job, and thanks for sharing!