 I’ve been planning my Christmas decor for this year, so I looked at my pictures from last year. And ugh, I hated how the stockings looked hanging from the wood burning stove. It made me think- why do I still own this fireplace? We never use it (we’ve lived here a year and a half and used it once). It leaks water when it rains and lets bugs into the house. And it’s ugly.
I’m just not a wood burning stove fan. The ambiance isn’t that great since you can’t see or hear the fire with the door closed and the fan on. Plus it gets hot and when Don was younger we didn’t feel great about having it going since Don might touch it. Also, Utah has lots of pollution with no burn days most of the winter. The only good thing is that it is great for warming up our house if the power goes out.
My husband and I have been meaning to do it, so I finally got rid of it! I listed the fireplace for sale on Facebook Marketplace and THAT day someone came and bought it for $90! I was thrilled! The very next day, I went shopping at an antique store and found a really cute fireplace. But I figured I could find something else somewhere else and kept looking.
But the more I thought about that fireplace, the more I thought about it and shopped around, the more I figured it was perfect! It was the right size and price (only $79). The shape was beautiful, but I didn’t like the finish. Nothing a fireplace makeover couldn’t resolve!
FIREPLACE MAKEOVER
Let’s start with the video tutorial so you get an overview on what I did. Then, I’ll dive in with more details below:
If the video doesn’t work here, you can watch it on YouTube here. P.s. I’m trying to build that page up, so if you’d subscribe, I’d really appreciate that!SUPPLIES
step 1
Start by priming. Usually with chalk paint you don’t need to prime, but since this had such a smooth finish, I didn’t want the chalk paint scraping off. I applied one coat of slick stick primer, waited two hours, then applied the second coat of primer. Then I let it dry overnight. Can you see how pretty just the primer on the fireplace looks?!
step 2
Next, apply two think coats of chalk paint. I used the color Cotton- a nice bright white! Use the tips on this post to get a smooth finish and avoid brush marks
step 3
And now, finish by spraying on some wax and buffing it in. I love how easy this top coat is! Plus the finish is matte which looks really sleek and modern!
after

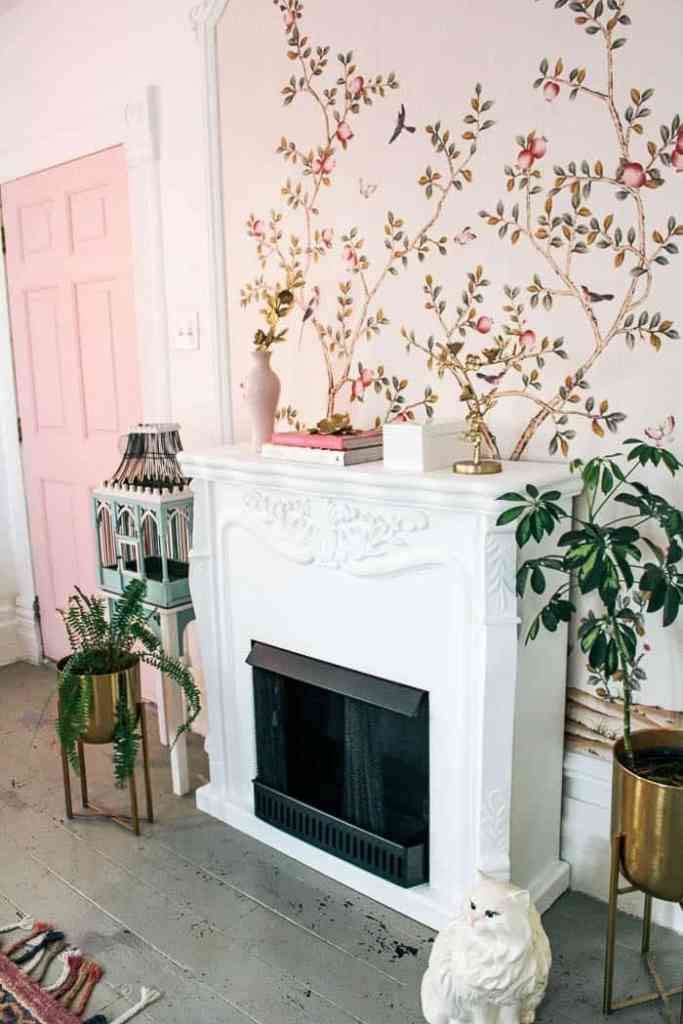
Ta da! I moved the fireplace over in front of the Chinoiserie wallpapered wall. It is SO perfect over here! I think it ties nicely in with the molding. 

I’ve never had a fireplace mantle to decorate. It’s perfect timing for the holidays! I honestly can’t wait to hang some stockings. Gah- I love it!!!
beautiful electric fireplaces
If you’re looking for a free standing fireplace, I found a few really beautiful electric fireplaces that are pretty. Plus, you just plug them in and flip a switch and then they run. So simple! 
one / two / three / four / five / six / seven / eight / nine
 This post contains some affiliate links for your convenience. Click here to read my full disclosure policy.


Ashley, it looks so good. Your vision for this was 👌. And it looks perfect in front of that wallpaper, so elegant and Parisian.
I have my hubby convinced to put an electric fireplace in our bedroom. I wonder if you are still happy with your bedroom fireplace or would recommend something else??
One more thing, we finally moved my laundry room out of the dungeon. Still working on the transformation to pretty, but functional is good for now. Thanks so much for your inspiration 😍😍
Hi Beth! Thank you so, so much! I still LOVE the electric fireplace in my bedroom. I use it every night before bed from September-April. It is cozy and the ambiance is great. I love that I can flip a switch and it’s on. I love that it’s safe around little kids. I’m a major fan!