
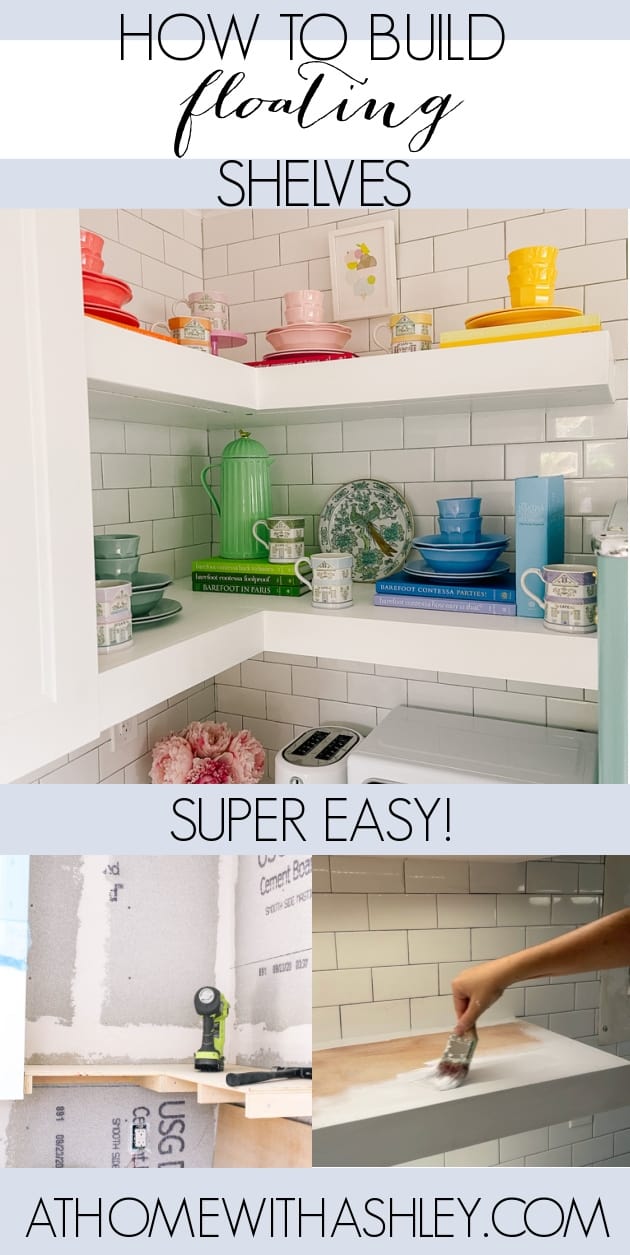
Last month I redid my kitchen and added DIY corner floating shelves. I wanted something custom to perfectly fit in the corner between my cabinets and fridge. They look high end and support a ton of weight because of how they are built. This is a project is an intermediate level project as you need to be precise to get professional looking shelves. \
how to make diy corner floating shelves
With our kitchen renovation, I changed the layout of the kitchen and moved the fridge to the side wall so I could have more lower cabinet storage and counter top space. However, I didn’t want to add an upper cabinet because we had plenty of storage space, but I wanted more decor space!
Here’s how the kitchen corner looked before the DIY corner floating shelves were installed:

It was just a black hole of wasted space. But I knew that an L shaped shelf would add tons of decorative storage- yes please!
And now I have pretty floating shelves that are custom, have under cabinet lighting built in, and have a place to display my collection of rainbow dishes. I think they make the room feel bigger. Since they’re open, they allow the eye to move around. And it added a really pretty element to the room. Instead of an upper cabinet, having functional decor is a huge benefit to me!
I love how my shelves turned out and now I’m excited to teach you how to make your own too! These don’t just have to be for a kitchen. They could work in a bathroom, living room, bedroom, or laundry room. Since these are 100% custom, they can be built to any size and can be painted in any color. Aka- they’re super versatile!

SUPPLIES
Ready to make the DIY floating shelves? Here’s what you need
- 2 Sheets Plywood 1/2″ thick (depending on the size and quantity of shelves, you might only need one sheet)
- Wood Glue
- Brad Nailer
- 18 Gauge Nails
- Clamps
- Drill
- 1″ Screws for the frame
- 3 1/8″ Screws for attaching the frame to the wall
- Wood filler
- White Paint– Ultra Pure White in a Satin Finish
Here are the measurements we used for creating our floating corner shelves. This is very specific for our shelves, but I thought it might be useful to show exactly what we did.

step 1- rip plywood sheets with a table saw for supports

Start by ripping the plywood sheets into strips of 2 1/16″ with a table saw. That’s a super specific number, but it makes for 3″ tall shelves once assembled. We wanted our two shelves to be the exact height as our 3″ tall subway tiles. Since these are custom, you can go with whatever height you want.

step 2- construct the arms of the frame

Next, use wood glue to put two pieces of the plywood strips together. This creates the support arms for the frame of the shelves. In addition to the glue, we ended up also using 1″ screws to keep them tight against each other. Then a clamp was put on the wood to hold it together while the glue dried. The arms are 14 9/16″ long.
Note- if you have other wood on hand, you can use that. We felt like ripping the plywood into strips was the most cost effective and made for the most professional looking shelves once assembled. Plus, this is a very strong method of construction.

step 3 attach the arms onto the back of the frame

And now, build the frame for the arms to connect to. The length of the back and side depend on what size your space is. For us, the finished shelves measure 32 1/4″ wide on one side of the L shaped shelf and 38 1/16″ wide on the other side. We wanted the shelves to end up being 15″ deep so we cut 14 9/16″ long support arms.
Can you tell how custom these are so they fit perfectly?!

The above illustration shows how the frame is built. The back (gray) is one piece of plywood. Cut that to the correct size and then attach the arms (green) which are two pieces of plywood glued together. Finally, fill in with one more piece of plywood (blue) so that the back and side of the frame are two pieces of plywood thick between the arms.
Use wood glue and screw the two pieces of plywood together to finalize the frame.

Next, use screws to attach the frame to the wall. Make sure to screw the shelves into the studs for a very strong shelf.

step 4- finish assembly

Now that the frame is on the wall, it’s the exciting part! Time to add plywood to the top, bottom, front, and sides to finish up the shelves. None of the frame will be showing. Instead, it’ll all be covered with plywood for a beautiful finish.
Cut the wood for the top, bottom, front, and sides to the correct size with a table saw. Then use a brad nailer to secure it onto the frame. Since our shelf goes in a corner, we cut a rectangular piece of wood for the top and bottom of one side and then cut a smaller rectangular for the other side.
Note, we also used a router on the bottom of our shelves to attach under cabinet lighting. This is obviously an optional step. For a kitchen I 100% suggest taking the time and expense to add it though.

Finally, use wood filler over the nail holes to create a smooth finish. Then, use caulk in the seams and along the wall to fill any cracks. Once that has dried, use a few coats of white paint to finish the shelves.

after

And here we have the finished floating shelves. I love how they are the perfect blank slate for decor and make the room appear bigger! When I first added the rainbow dishes, it looked a little bare so I have slowly added coordinating colorful cook books and mugs from the Lenox Village collection.

I’ll do a post soon all about the rainbow cookbooks because I happen to believe they are the perfect functional and decorative accent in a kitchen. Don’t they look pretty?!

I’m of the opinion that decor looks prettier layered and gathered over time! Besides the rainbow dishes and ice cream art, all of these are second hand finds. I still need to find some mint and pink cook books, but that’s part of the fun!
is it cheaper to build your own shelves?
For our shelves, we spend about $100 on two sheets of plywood. The rest of the supplies we had on hand. For two custom shelves, I am very happy with that price. Instead of building the support frame, you could also buy these floating shelf brackets and then add a plywood box around the brackets. That’d keep it cost effective.

After pricing out shelves pre-made and the option of making my own, I found that it was less expensive to buy the materials and construct my own. Plus, pre made shelves just didn’t come in the custom corner size I needed.
If you’re doing rectangular shelves, you can always search for some from a store. They’d probably cost a bit more than building your own, but save on time.
do you need studs for floating shelves
For a shelf over 16″ wide, you might as well anchor it into the stud since you’ll go over at least one. The more studs you can drill into and attach the DIY floating shelves too, the stronger they will be. I suggest using a stud finder to locate the stud and then make sure to drill the frame into it.

If you don’t hit a stud when installing, you can use a wall anchor or toggle bolt to help the shelves stay on the wall. You’ll have to be cautious about what you put on top of the finished shelves since it won’t support as much weight.
how much weight can floating shelves support?
It depends on the material the shelves are built from, how many studs were screwed into when installing, and how deep the shelf is. A standard floating shelf can support around 35-50 pounds. Mine feels very secure and I’d guess could hold up to 100 pounds easily.

There you have it! My cutie diy corner floating shelves. We worked so hard on customizing this kitchen and adding special elements. I love sharing them with you! Let me know if you have any questions.
 This post contains some affiliate links for your convenience. Click here to read my full disclosure policy.
If you love it, pin it!
dear precious Ashley! 🙂 Oh the floating shelves are precious & all that you added is gorgeous! It seemed to make the mint green sink & the fridge pop even more! Your family kitchen is a dream come true! & look how your lil puppy baby Derek 🙂 blends in so beautifully with the floor ~ how cute! & Congratulations on HGTV magazine!! It’s beautiful! I receive HGTV decorating emails & your designs are in them often for happy colors~they love you too! Thank you for bringing such happiness & for your kindness ~ your videos are delightful & Don 🙂 is precious & it makes for such a happy corner of the world & brings a smile to the heart~xo!
These look so good! Look up the Honeysuckle cookbook, it is the perfect pink for your shelves, and it’s a really good cookbook by a blogger!
I love the idea of using a router for installing lights inside the shelves! These shelves really make your kitchen a show piece.
Love this idea – so pretty! Clever idea with the lights too!
Beautiful finish. I love it!
Love your bright kitchen corner, and those dishes – swoon! Thanks for sharing at Vintage Charm. xo Kathleen