Over the past few months I have been slowly redoing my living room- buying items when I fell in love with them and slowly layering in pieces when it made sense. I thought I would be done at the beginning of November and that I’d share with you reveal photos then. But life happens.
I am finally done with the living room and wanted to share with you where we are at today with the Christmas decorations all up! P.s. keep reading to the bottom for a fun giveaway!
end table
First off, I ordered a brass and marble end table and this is what arrived:

Its gorgeous! But I really wanted the grey marble that was shown in the photo on the website (the green looked terrible with the rest of my decor). The company didn’t want me to return it and refunded me fully, so I figured I’d make it work.
I bought a roll of marble contact paper for $6 on Amazon. traced the hexagon, cut it out and covered the green stone up.

Its not perfect and not a permanent solution, but I’m pretty dang happy with it! Essentially, I paid $6 for this end table that I am 98% happy with!
The last area of my living room that was driving me nuts was this console table:
The toys live underneath the console and are always an eye sore. The books are too tall to sit on the shelf and the top was a magnet for clutter. I’ve known for a long time that I wanted shelves here and finally bit the bullet! I shopped online for hours but never really found something that I loved. So I decided to DIY a bookcase!
DIY gold and marble bookcase
First off, I bought a $79 Vittsjo bookcase from Ikea. It comes in a black metal with clear glass shelves:
The size was perfect, but the finish was not. I wanted the frame to be gold and the glass to have a marble look.
For the glass, I wanted to update it since I really don’t love that you can always see finger prints and dust. So I decided to also cover it with the marble contact paper for $12 (I needed 2 rolls). I figured that covering the glass would make it more child friendly.
The contact paper was a bit of a paint to put on. But I figured a solution, so I wanted to show you what I did.
I’d prop the glass shelf up on my sofa and get the end started really well. Then I’d peel a little of the backing paper off and squeegie it down and I got virtually zero air bubbles this way! I cut the contact paper a little big and then would trim it when I was done. I covered both sides of the glass with the contact paper. 
To make the frame of the bookcase gold, I used Rub ‘n Buff which is $7 on Amazon. I needed 3 bottles of it. Another option that is probably easier would be to spray paint your shelf gold (this gold spray paint is my favorite for $3). Since it was too cold outside to spray paint, I went with the Rub ‘n Buff.
This is a new product for me, but I really liked it! It is definitely made for small projects, but I made it work. What you do is put a drop on of the paint on and then rub it in with your finger until you have a soft finish. You get a burnished look that is really pretty. It did take a long time for me to paint the whole thing gold though!
after

I am so, so happy with how it turned out! It’s the perfect focal point for the room! One of my favorite parts is that I organized Don’s toys into $7 Kuggis plastic bins from Ikea. The toys are hidden, but still easy to get to.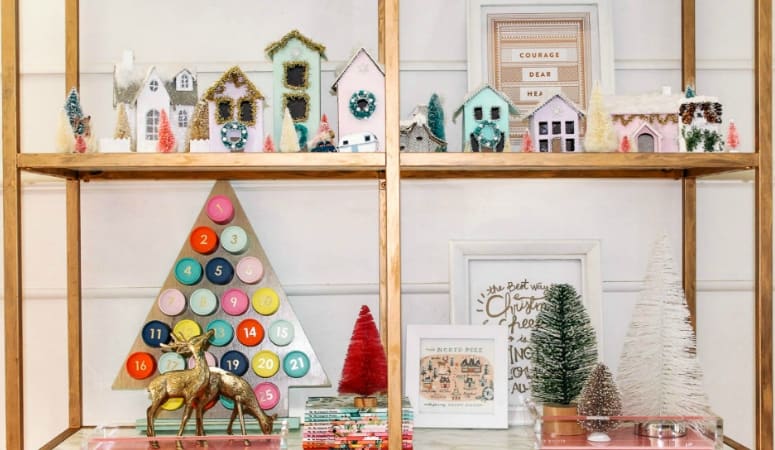
I, of course, had to get it all decorated for Christmas!
Isn’t the marble looking shelf pretty?!

And I am in love with these acrylic and pink trays (also from Amazon). Here’s the link to the large tray and the small one. They come in a bunch of different colors too!

This shelves holds my Christmas village. I made it a few years ago on a budget- here’s the link to the tutorial.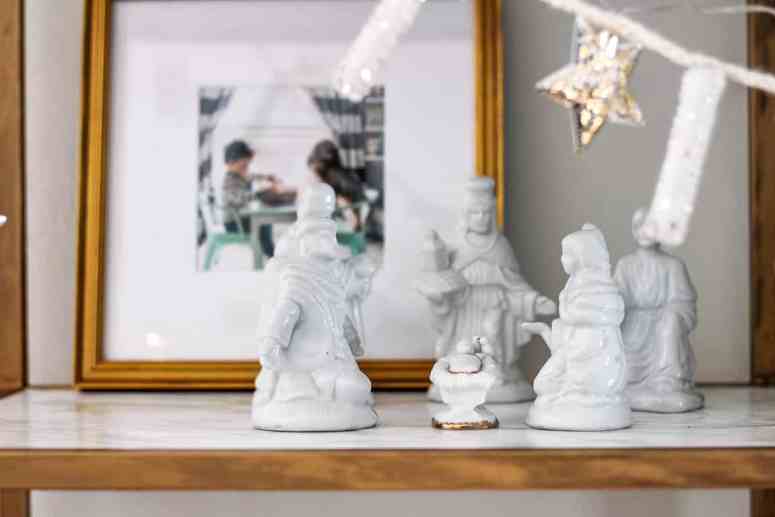
The top shelf holds my vintage store Nativity. Nice and high- away from my little two year old.
Up top I have my nutcrackers from Smith’s and the “Let it Snow” garland that I got from West Elm last year (they make a new version every year and this year’s garland is pretty cute!.
One last look at this pretty shelf! I added pink paper star lanterns around the living room this year and I love them! Anything to bring in more pink and they really make it feel special in here.
christmas tree

On the day after Thanksgiving, Don and I decorated the Christmas tree. We had such a good time! I gave him all of the shatter-proof ornaments and he did the bottom half where he could reach. We listened to Christmas records and we both really enjoyed it.

How cute are Don and Lucy posing next to the newly finished tree?! The faux fur stool is also a new addition that is perfect for extra seating.
 I’ve done these tree decorations for a few years now and still love them. Every year I add a few new ornaments and am happy with how it looks. Maybe next year I’ll do a whole new theme 🙂
 A few details of the ornaments on the tree. I love the idea of incorporating whatever color you love into your Christmas decorations!
letterboard

I updated my Letterboard with this $8 letter kit from Heidi Swapp. I love that it adds a subtle festive touch.

Also, if you’d like my tips on how to organize Letterboard letters, here’s that blog post.
living room decorations

Throughout the living room, I put a few small Christmas decorations like a mini Christmas tree, trim on the shelves, and a noel pillow.

The star of my living room updates is definitely the new sofa from Down East Home! It anchors the room with the warm caramel brown.
Isn’t it beautiful with the new end table and my pink chair?!

I sure love this time of year! I honestly think my house is the prettiest at Christmas time- the tree and lights just make everything feel so cozy and happy. Are you all decorated for the holidays? What colors do you use for your home?
giveaway

Alright who’s ready for a giveaway?! I recently got a new pair of shoes! They are ridiculously comfy and super cute too! I love looking chic, while being super comfortable. These have a faux fur insole and isn’t the gold embroidery gorgeous?! Below are 15 ways you can win a pair of your choice! Plus you’ll get them in time for Christmas- wouldn’t these be perfect for opening presents on Christmas morning?!
Shop this post:


This post contains some affiliate links for your convenience. Click here to read my full disclosure policy.
love the marble contact paper, especially as the solution for your little table. enjoy!
b
These are super cute! Love the post! Thanks for the giveaway.
You’re such an amazing decorator and designer! I don’t know how you do it!
Such a great giveaway! And your home looks beautiful decorated for Christmas!!
I so love that side table!
Awesome work! How many rolls of marble contact paper do you go through? 😄
Thanks! I went through 3!
The coloe scheme of this room really caught my eye and I love what you did with the shelves! Using the marbled contact paper is such a great idea and the way you styled it is inspiring me to attempt to replicate it. Thanks!
Your blog is so beautiful!!! Love your newly renovated bathroom.
Is it just me, or is this post incredibly aesthetically pleasing?! I have loooved looking through your photos Ashley.
I’m especially fond of your bookshelf DIY, I bet painting it took you ages! If you had used spray paint, would you have done anything to the black metal surface first? Or just sprayed straight onto it?
Thanks for sharing your beautiful room with us 🙂