 Merry almost Christmas! Well, I knew that I wanted to make a unique ornament for my tree this year and I thought I was SO unique when I came up with this idea. Then I searched on Pinterest (after I was all done) for little letter boards, and well, it’s been done. Lol! But no one has done it like me! So I have a simple and colorful tutorial for you for how to make a mini letterboard ornament. I hope you love it!
how to DIY A MINI LETTERBOAD ORNAMENT
Let’s start with the video tutorial so you get an overview on what I did. Then, I’ll dive in with more details below:
If the video doesn’t work here, you can watch it on YouTube here. I’d be over the moon happy if you subscribed to my YouTube channel! Videos are actually released on YouTube first (usually the night before they’re published on the blog). Thank you!SUPPLIES

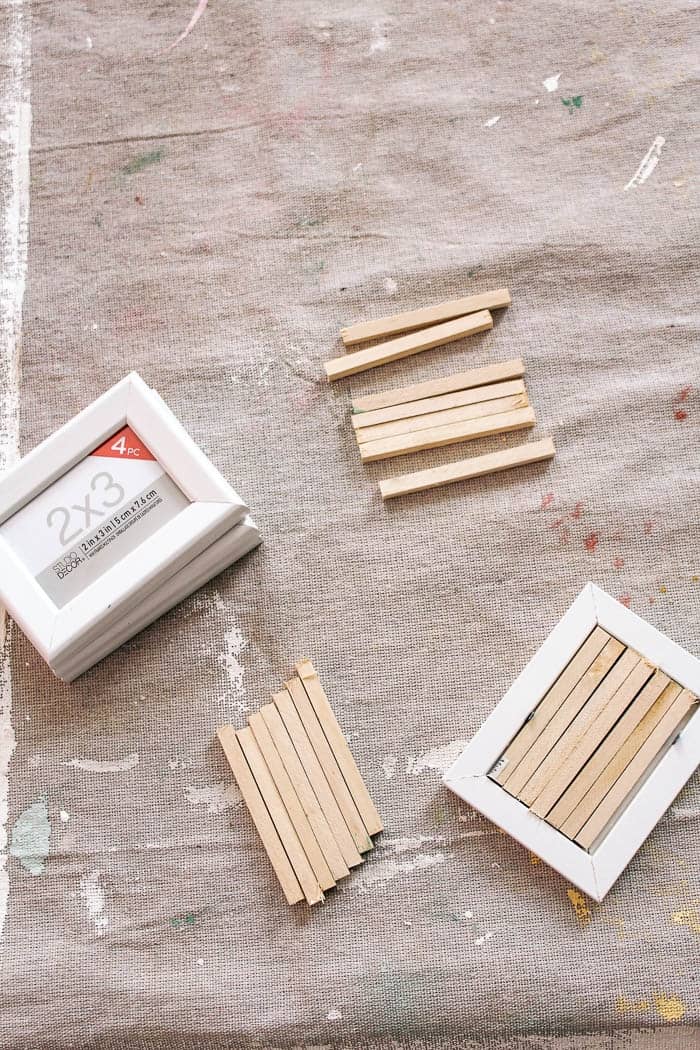
- mini 2×3 picture frames– I got a set of 4 for $8. You could also make your own frame with 3/4″ wide wood.
- Square craft wood dowel– 1/4″ 3 pieces of the 36″ length $0.79 each.
- Paint- Ballet Rose, Lamplit, Country Weekend, and Watery
- Mini miter box saw
- Letterboard Letters
- Liquid Nails
step 1

Start by cutting the wood dowels to 3″ long. If you’re using a 2″x3″ frame, you’ll need 7 pieces per frame. I used a chop saw for this, but a small miter box and saw would work like a charm for this too!

step 2


Next, give the frame a quick sanding. I skipped this at first and the paint wasn’t sticking at all. Once the frame is sanded, paint it and give the wood square dowels a coat of paint too. My frame needed 2-3 coats of paint and the dowels were fine with one coat.

step 3

And now, it’s assembly time! I used liquid nails to attach the painted dowels inside the frame. I started with the ones on the edge and used a card as a spacer. Then I put in the inside dowels and let the glue dry.

after


To finish up the letter boards, I used 1″ letters I had on hand for my normal letter board. You could use smaller letters and put more words on it too. I like that these are actually functional and you could potential use for other holidays or as a name tag at a place setting.
 I thought that I’d also link to a few other Letterboard ornaments in case you want to see different ways to make them!
- My friend Stacy made her own frame and then glued felt close together to make her mini letterboards.
- The Latina Next Door used rounded dowels covered in felt to make her Letterboard ornament.
- And My Sister’s Suitcase used corduroy felt in embroidery hoops to make round Letterboard ornaments.

I didn’t add a string, but just propped the frame in the tree. That means that I can use it for more holidays. But if needed, it’d be easy to hot glue on a loop of twine or ribbon.
The second I put these on the tree I LOVED them! I like a strong color story and these added a ton of color. I only wish I’d made more! What do you think?

 This post contains some affiliate links for your convenience. Click here to read my full disclosure policy.
If you love it, pin it!
These are absolutely ADORABLE! Such a great idea and so easy to make. Pinned
Thanks so much Marie!