Hi Friends! I have started thinking about my stairs. If you remember from this post, my stairs are a big Pinterest Fail. Aka, I read how to wallpaper/paint my stairs from Pinterest and it turned out horribly wrong. Everything was fine (the wallpaper, the paint), until I put on a finish coat of polyeurthane. This clear coat (which was supposed to protect the stairs from getting scuffed up) turned the white paint yellow, curled up the wallpaper, and left bubbles everywhere. It was a major fail! But I have been living with it. Can I stop now for a PSA? If you are planning on painting your stairs, let me try to talk you out of it. Here are the cons:
Holiday Decorations
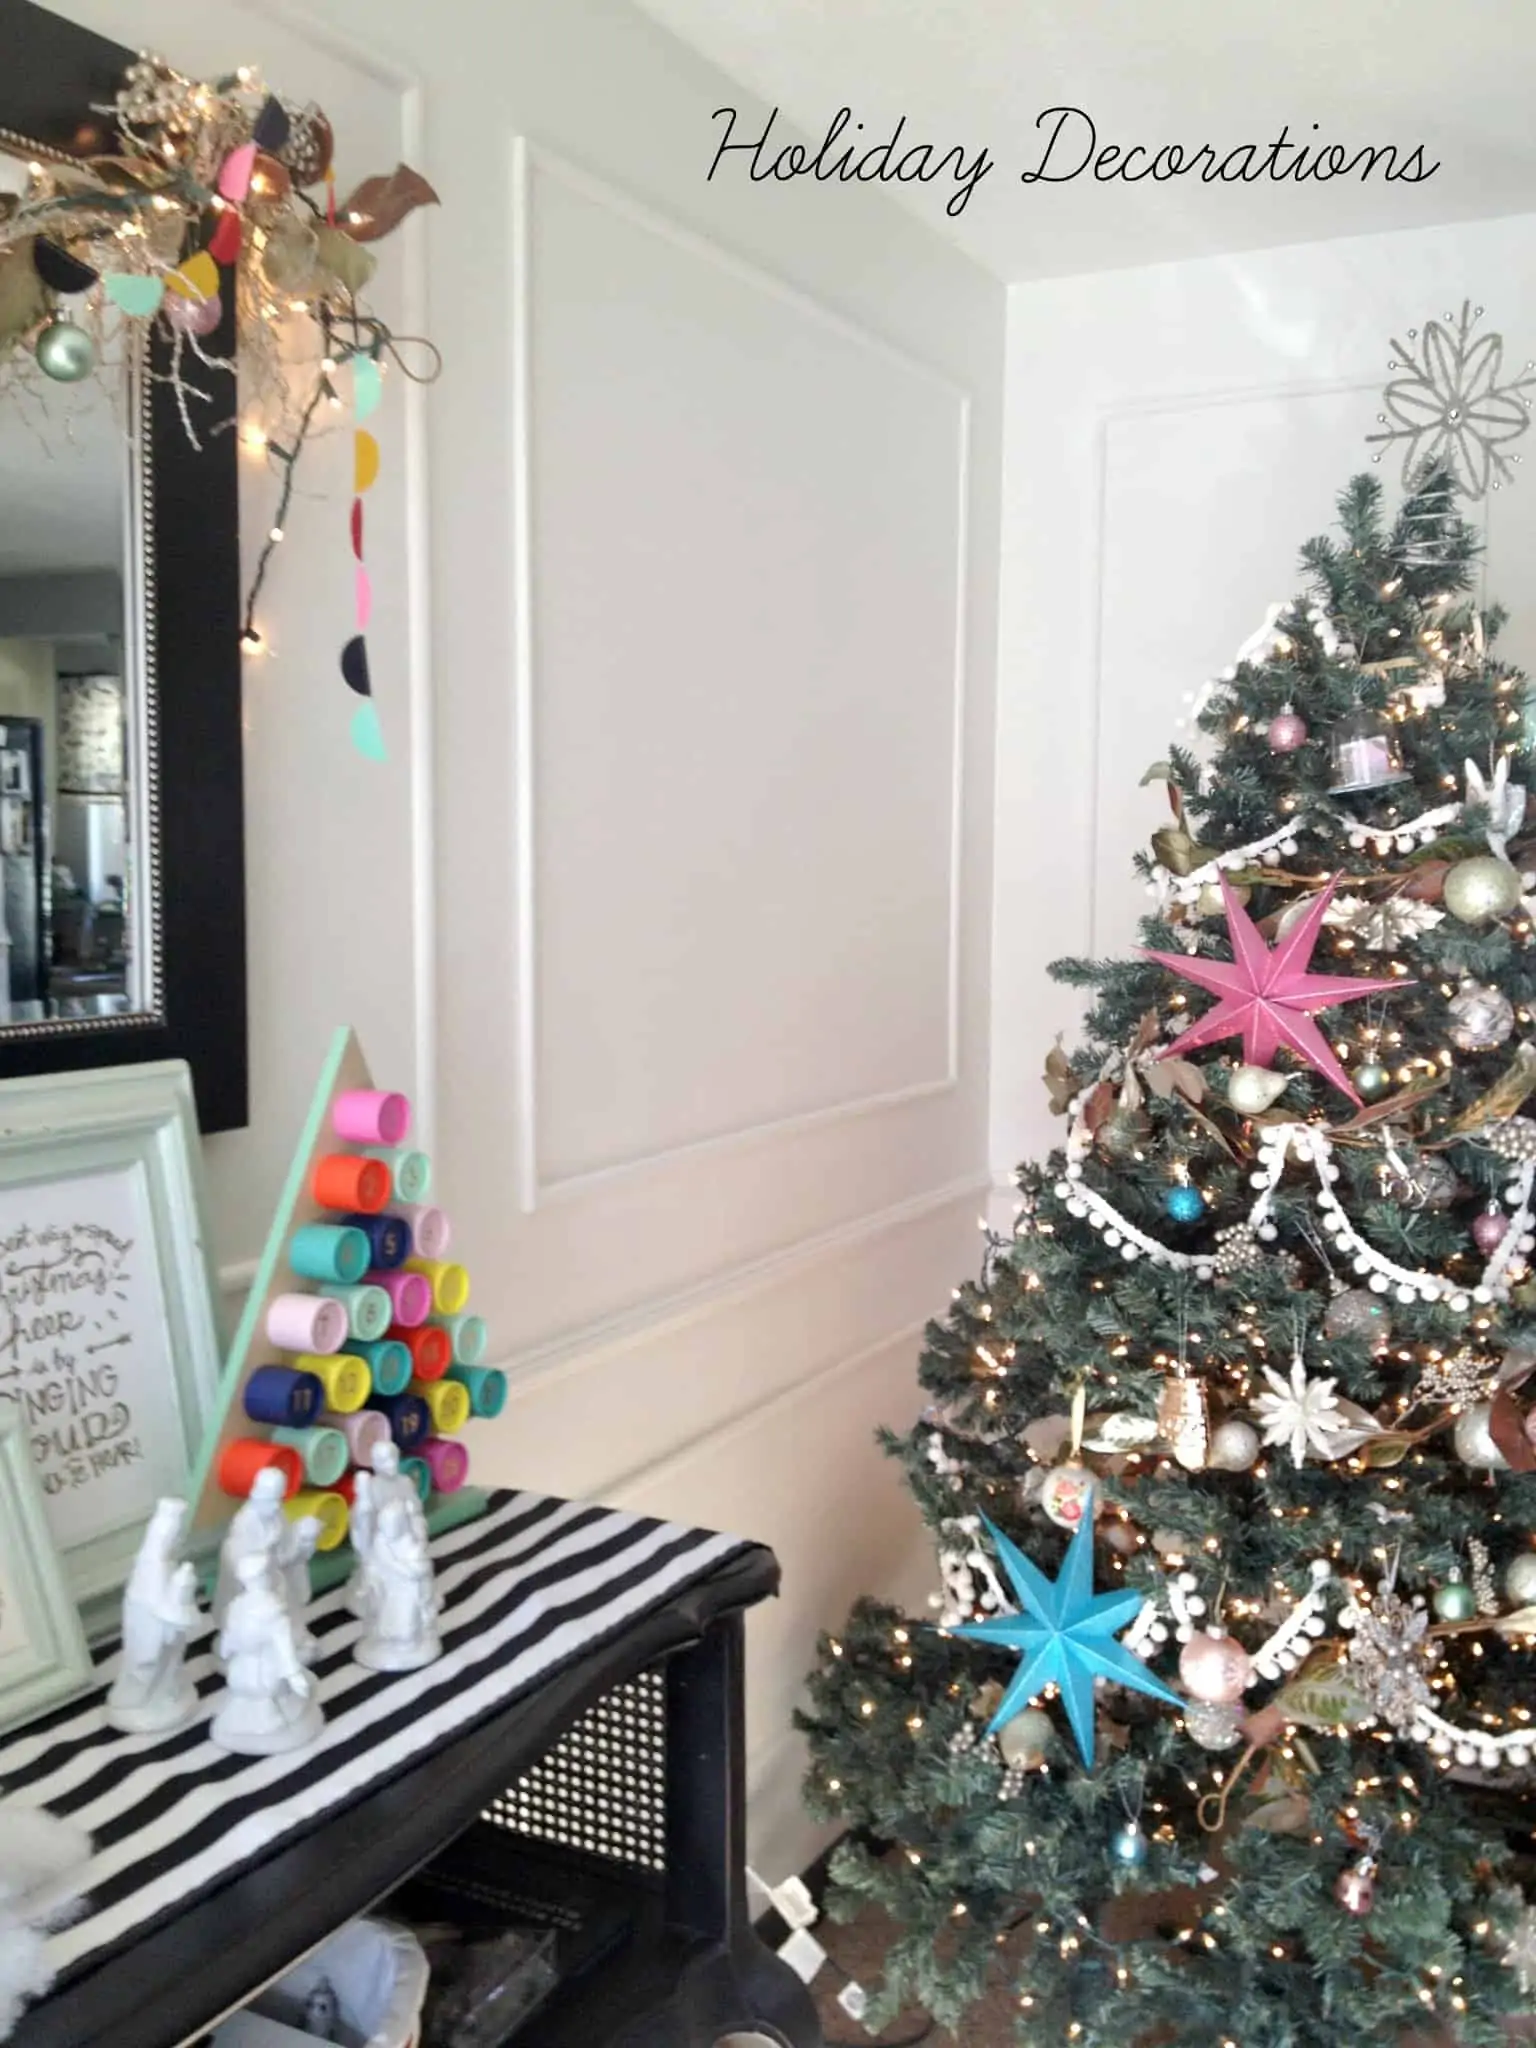
Hello! Today I am sharing my holiday decorations! In this post, I shared my Christmas theme and some inspiration pictures, and interestingly enough, I veered from those photos. I went more pastels and less black and white. But I love it! And am so happy with how it came together! Let’s dive right in:
The Christmas tree is a pre-lit one that my husband and I got our first Christmas together 8 years ago from Kmart. The lights have gone out a million times and I have to fix a section every year, but I still love the convenience of a pre-lit tree. The neutral decorations are ones I have had for years- a magnolia garland, pom pom fringe from the fabric store, and silver ornaments. I added in pink and mint and blue ornaments from Target and Michael’s this year. The “tree skirt” is just a faux sheep skin from Ikea (no longer available). Side note, but how nice does the tree look against the white walls I just finished?! Love!!! 🙂

The colors for my decor were based on the advent calendar I got (no longer available) from Target. My husband saw it and asked why it wasn’t Christmas colors and instead “Ashley” colors- lol!!! That with the candy colored houses and garland really pull together the mint and pink color scheme. I hand lettered the quote from Elf and the North Pole cards are from Rifle Paper Co (no longer available). Also if you missed it, here is my tutorial on how to create a Christmas Village on a budget (less than $50)!
For wrapping this year I am doing craft paper with polka dots on it from Michael’s with pink ribbon and mint blue gift tags (all from Michael’s)
The last area I decorated was the sofa with a simple Noel pillow from Target (no longer available) and the end table with a mercury glass tree.
I am so happy with how everything came together! Honestly, the best part is finally having it up so I can show my baby. He stares up at the tree mesmerized and tries to grab the ornaments that are just out of reach (why the bottom of my tree is very naked). I am so excited to celebrate with him this year!
How to Create a Kid-Friendly Christmas Village on a Budget
Good morning! So this year I became obsessed with the idea of a Christmas village for our house. I had been pinning Christmas inspiration to my Holiday Pinterest board and kept loving images with Christmas villages.
My little sister put up a village in her house and it made me think maybe I could do that too! I am on a budget, so I looked for alternate options to the glass (not super kid friendly) ones. So here is my How to Create a Kid-Friendly Christmas Village on a Budget tutorial!
first step- inspiration
I looked back at my pins and here are my favorites:
Images via 1 2 3 4 (3 & 4 no longer available)
step 2- shopping!
Most of the links suggest downloading a free pattern and tracing and cutting them out yourself. With a baby to care for and a full time job, I just don’t have time for that (although it is a cheap option)!
So I did the next best thing and bought a pack of 5 chipboard houses on eBay for $9.95 (no longer available). Of course, I needed some bottle brush trees on a budget, so I bought a pack of 8 pink trees for $3.75 and 8 white trees for $4.95 (both no longer available). When I was at Target, I saw a little house for $3 so I picked that up too.
On Black Friday, Michael’s had an amazing sale- the Christmas village stuff was 40-50% off plus you could get 30% off your total purchase (including sale items). I got a mini trailer for $3.14, a car for $3.14, wreaths for $1.04, light up lanterns $5.45, and a roll of fake snow for $2.82.
I went back and bought some embellishments (tinsel, fake snow for the roofs, silver beads, tiny pom poms) for $10. In total, I spent $47.42 on everything I need for my budget Christmas village. One Lemax house is $59.99, so I felt like that was a win. Now, it was time to paint!
step 3- paint

I used Martha Stewart craft paints I had on hand. I used the colors Beach Glass, Heliotrope, Pink Taffeta, and Pea Shoot and mixed them with white paint so they were super pastel-y.
The houses come with the windows still in, so you have to punch those out to start.
I painted the houses un-assembled because I figured painting a flat object was easier. Each house needed a few coats of paint. I used a foam brush (it gave a much thicker coat than a paint brush with bristels). I painted the roofs of all of the houses white since I wanted it to look like it snowed.
I then used a hot glue gun to assemble the houses and put on the roofs.
step 4- embellish
I added embellishments like doors (from the windows I punched out earlier) and wreaths with the hot glue gun.
step 5- display your village
To create the base for the village, I laid out books so I could have a bit of a hill
I then added the snow on top, layering it on so the table was completely covered
I put the houses on and realized that the houses were looking a little sad- not enough details
So I pulled the houses off and added embellishments- tinsel, snowflakes, beads, and mini pom poms to the wreaths
The last step was to add fake snow to the roofs. This really softened things up! This was probably the most fun part- seeing everything come together!
I put the houses up and just like that! We have a bona fide Christmas village!

Isn’t this little car and trailer the cutest?! I tried finding mini deer, but they were sold out or too big. Maybe next year!


So, I’m super happy with how it turned out! For less than $50 I love that I have a village that matches my decor and is kid friendly. Plus it makes me smile- and isn’t that what Christmas decorating is all about?!
This post contains some affiliate links for your convenience. Click here to read my full disclosure policy.

How to Install Picture Molding
Hi everyone! I finally put the finally touches on my picture frame molding and can’t wait to show it to you!
Here we go! How to install picture molding
First of all, picture frame molding is when you have boxes of trim above and below your chair molding. It’s a very classic/traditional wall treatment that I’ve always wanted in my home. I’ve been seeing it lately (check out Kate Spade’s home collection) which gave me the push to finally get it done!
Step 1- make a plan. I carefully measured and decided how to space the trim. The blogs I read suggested 4-5″ between trim, but I ended up doing 8″ from the ceiling and baseboards so that I would be just above all of the outlets (going below them would have been 1″ above the baseboards and I didn’t want to have to make extra cuts to go around them).
I also wanted to leave space for the option of crown molding in the future. I did 6″ between the rest of the trim and that helped me avoid 2 light switches. Honestly, the closer your trim is together, the better it will look. I am happy I didn’t have more cuts to make, but closer would have looked just a little better. The next decision was how big of boxes to do on my main wall (all other walls have one big box). I ended up doing three boxes of trim with the biggest one in the middle sized perfectly to frame my console table. I quickly drew up a plan which became my reference as I made cuts. It was indispensable!
Step 2- decide how much trim to purchase. I added up all of the pieces of trim I needed and brought that length with me to Home Depot. I didn’t buy much extra, but my husband later informed I should have purchased 10% extra. So do that 🙂

Step 3- buy your trim. My baby and I headed to Home Depot bright and early one morning. I wasn’t as diligent with this trip and had NO clue what I was going to buy. I ended up getting the cheapest wood option they had- it was $0.57 per linear food and is a base shoe molding. They came in 16′ lengths which was hilarious to cart around with my baby. Even with buying the cheapest option, it was $102.00 for the trim for one room (a bit more than I hoped to spend).
Step 4-tools. After I installed my chair molding I threw all of my tools into a hamper and shoved them into my closet since I knew the next weekend I would need them all again. I love myself for doing this! Here’s the list of tools I used:
- Picture Molding (I bought 11 of the 16′ size)
- Level
- Blue Painter’s Tape
- Hammer
- Finish Nails
- Miter Block
- Tape Measure
- Caulk
- Liquid Nails
- Caulking Gun
- Wood Filler
- Sand Paper
- Paint Brush
- Paint
- Paint Stirrer
- Drill
- Drill Bits
- Hack Saw
- Drop Cloth
- Plans
- Nail Setter
- Wet rag

Step 4- prep your walls. I took out my level, pencil and plans and drew onto the wall where they would go. This step is vital if you and hanging with just a hammer since you only have one hand to get it level and can’t use the level as you go. I then added blue painter’s tape to the wall so that as I was installing, I could easily tape up the trim to hold it in place.

Step 5- figure out the inside and outside of your trim. So, I thought I had done enough research before starting this project, but I was wrong. I started cutting, installed 4 pieces and then saw I was doing it wrong!!! It was the worst! I wanted to give up at a few points in this project and this was one of them. So here is what I was doing wrong so that you can do it right- if your trim isn’t symmetrical, you have to choose which part of the board is the outside and which part is the inside and be consistent. This means that you will have more waste because you’ll have to cut off a little bit of trim to start your angle correctly. As soon as you figure this out and get in the rhythm of changing the direction of your 45 degree angle cut with every cut, it’s easy again. But don’t say I didn’t warn you- haha! Chair molding is easy peasy compared to this.
Step 6- start cutting! Now you are ready to cut! I started with the two top boxes on my biggest wall. I cut all four pieces of each box. Because the heights and lengths were the same on both boxes, I would line up the pieces of trim and the two pieces that were most similar went on the same box.
Step 7- installation time. Now that you have some pieces cut, start putting them up. I reccommend not cutting too far in advance just to make sure you are doing it correctly. Once you have it right, you can put it up! I pre-drilled a few holes, added some liquid nails, and then nailed it up.
Step 8- installing the last corner. As I hammered up the trim and got to the last corner, I wouldn’t nail in the last part of both pieces of trim that were meeting up to create the last corner. That gave me flexibility to push them together so they would fit snugly. They might have gotten a tiny bit off level, but the seam was perfect and I couldn’t tell with my eye when I was done if it wasn’t perfectly level.
This was where I was at after one long day. I was happy I had gotten it right, but discouraged that it was taking so long! I went to dinner with my extended family and told them how ridiculous I felt- sawing away with a hack saw, hand nailing it in. I was getting it done, but slowly. And then they made fun of me (in good spirit, of course) and reminded me that my dad owns an electric miter saw and a nail gun. Lol (forhead smack)!!! So I borrowed them. I want to pause here and say that with $50 in tools you can do this project, but it will be a bit slow. Or with $500 in tools it will be much faster. This is a project anyone can do, but better tools does make it faster. The next day I put the saw and nail gun to use and got the rest of the pieces installed!
Here is what I did differently with power tools:
Saw- I wore safety goggles and with every cut I asked myself “am I going to cut my fingers off?” Haha! But seriously, I went slow with the cuts so they were clean and made sure to be safe. Trim isn’t worth a trip to the hospital.
Nail gun- I quit using liquid nails adhesive to back my trim. Because the nail gun buries the nail (and I don’t have to use a nail setter with each nail, thus using nails sparingly), I used many more nails and go the trim flush with the wall this way. I also quit taping the trim to the wall since I had enough nails to secure it easily.
Level- on the second and third walls that I hadn’t prepped, I used a level to draw out the beginning of the square and then used the level and nail gun as I went to install the trim. This was much faster!
Next, here’s all about the finish work- caulking, sanding, painting. Aka, making your mistakes disappear so all you see is glorious white molding!
Step 1- load your caulking gun with paint-able caulk. Make sure the opening on your caulk is facing down. This will help you make sure the bead of caulk goes right into the seam.
Step 2- put a bead of caulk along all seams and nail holes. The above picture was my worst seams (I ran out of trim on the very last cut so I cobbled two pieces together. This part is behind the sofa, so it won’t be seen). The thinner the bead, the better!
Step 3- smooth with your finger. Keep a wet rag handy so you can put the excess on the rag.
Step 4- smooth with a rag to get off any access. This will keep your future sanding to a minimal (if you will have to do any). You will then smooth with your finger one more time. Smoothing with the wet rag creates lines in the caulk and your finger will erase those so the finish is perfectly clean!
Step 5- stir your paint. You want to make sure it matches your finish as closely as possible. Some people like to do all of their painting at once (I painted first and then just painted the trim) so that the finish is perfect. That way probably yields a better result, but all of that cutting in, no thanks!
Step 6- paint. As soon as your caulk is dry, it’s time to paint all of the trim (all sides). Now you start seeing how pretty your hard work came together! My trim needed two coats. It probably took me three hours for all of the caulking and painting. And just like that, you are done!
And now for the part everyone is waiting for- before and afters:
So much better and lighter, right?! I love the character! Here’s from the other angle:
Thanks for following along! I have some finishing touches to add in, but it is so exciting how far my living room has came!
Christmas Traditions to start with your Family
Happy Monday! This is a short week because of Thanksgiving, so that is definitely something to be thankful for, right?! I wanted to talk about something that has been on my mind lately, and that is Christmas traditions to start with your family.
My husband and I have our own traditions, but now that we have Don, we want to start some new ones to help make Christmas magical for him. My parents were so good at this- I had a wonderful childhood and want to provide that for Don. Here are what I think I will start with this year:
christmas pajamas
note: some affiliate links used

Christmas Pajamas. In the summer I bought Don some Christmas jammies at a Down East tent sale (you can usually get them at their clearance center in Salt Lake too). They are Pottery Barn pajamas and so cute! The problem is that the ones I bought (for $2.50!) had a random name on them.
I spent forever picking out the old name and I was left with a million holes. So I embroidered Don’s name and some strategically placed stars to cover the stars and we are good to go!

Aren’t these gender neutral options from Target so cute?! Red stripes or grey plaid are both cute options for opening presents and then you can still use them all winter.
I am also going to buy some pajamas for me (I just can’t get out of my mind how cute a mommy/baby Christmas morning photo will be 🙂 ).

I am thinking these grey or red ones that I could wear all year. These pajamas also come in men’s options (here’s a link for the grey and one for the red) if you want the whole family to match!
christmas books
Favorite Little Golden Books for Christmas from Amazon
In my house growing up we had a huge book and it had a different Christmas story to read each night. I loved it and had some favorites that I looked forward to listening to every year. Is there anything better than snuggling up with your family and listening to a good story ?!
I have started a small collection of books and can’t wait to read them to him (and add to my collection each year). We have (and love) Santa’s Toy Shop. I’d love to buy Rudolph the Red-Nosed Reindeer and How the Grinch Stole Christmas.
Advent Calendar. I saw the cutest advent calendar at Target (no longer available), but I didn’t get it because I figured Don was too young. During October I did a “fall bucket list” of some fun activities and we had such a good time! We went and did things we never would have without the list.
Anyway, while I was writing this list I changed my mind about the advent calendar and bought it. I am so excited to use it! I made a list of activities we could go do (and I will put candy in the other days for my husband and I). Here are some things I am thinking of:
christmas bucket list
- See Christmas Lights
- Buy Don a “Baby’s first Christmas” Ornament
- Watch a Christmas movie and make hot cocoa
- Go gift shopping
- See Santa
- Go to my work Christmas party
- Go to my family Christmas party
- Visit my husband’s grandma
- Go ice skating? (Don is probably too young)
- Go sledding? (Don is probably too young)
- Buy a gift for a charity tree
- Decorate a gingerbread house
- Send out Christmas cards
This list will definitely change each year as Don gets older. I’m thinking more crafts will be good. If you need help coming up with ideas, here is a list of 150 activities for advent calendars!
countdown candle
If you have small children (not just one baby like me), you could also try doing a countdown candle. I loved doing this when I was little! You just burn the candle each day- it doesn’t sound so exciting, but I promise your little ones will love counting down this way!
ornament
I love the idea of getting a special ornament for Don each year. I like a cohesive tree, so I love the idea of this brass 2017 ornament. Or maybe a letter D felt ornament would be cute.
Christmas Morning
Years ago, I read the Oh Happy Day blog about Jordan’s Christmas morning tradition. What she does is sets up a magical installation of her son’s toys leading up to the tree on Christmas morning so it’s extra exciting. I love that idea and have held onto it!
I also had a friend tell me to not bother wrapping my baby’s presents- he’ll be too young and understand the presents easier. So I have a little installation planned! I am so excited!
Any Christmas traditions you are starting this year? I’ve loved writing this so I can be deliberate of how I spend the season. Bring the activities! I can’t wait!
This post contains some affiliate links for your convenience. Click here to read my full disclosure policy.

How to do a Monthly Growth Photo for your Baby
Hello!!! And welcome to the last day of Photo Week. You guys, my baby just turned 8 months old. Where has the time gone?! I can’t be too sad because he is so fun! And into everything. He loves nothing more than to explore. His favorites? The dog food and water bowl and doors. So exciting! Haha! When Don was born, I decided to take a monthly photo of him so I could see his growth at the end of the year. So every month, I set up a little photo shoot area and take a million pictures of my monkey.
Here are some tips so you can do the same:
How to Do a Monthly Growth Photo for your Baby-
- Gather inspiration. Pinterest has so many great ideas! Below are the two inspiration photos that I used to create mine
2. Choose the elements you will have in every shot. I use a rocking elephant (from Pottery Barn kids), chalkboard, and furry rug from Ikea. Using the same elements each time will really highlight your baby’s growth
3. Choose the location. I take the picture in Don’s nursery against his wallpapered wall. Pick somewhere with a background you like and can consistently use for a year
4. Choose the clothes. I am dressing my baby up in all white. I have seen people just put their baby in a white onesie or diaper or they switch it up each month
5. Choose a way to document their age. The most common ways I have seen are with a chalkboard (like what I am doing) or with a onesie with a number on the front. Or you can edit each photo to add their age. Just do something or you will forget and it will be just another cute photo of your baby.
6. Be consistent with the filter. I wish I would have used the same filter on all of my images and may go back and edit them all at once so at the end of the year they are the same. You just want to make it as easy as possible to compare how they have changed from month to month.
There you have it! It’s pretty easy to do and I think my baby will love looking back on them one day. I figure he will never change physically so much in a year as this one! And yes, I did stare at these too long and got sad at how big he is- haha #sillymom
p.s. I complied lots of inspiration photos for these monthly growth photos on my Pinterest board:
Follow At Home with Ashley’s board Pictures to Take on Pinterest.

How to Store your Photo Memories
Hi Guys! Photo week continues with a how to store your photo memories. With pictures gone digital it is SO hard to get them off your camera/phone and create something you can hold on to. On Monday I gave my tips for printing Instagram photos. But what about documenting the rest of your adventures? I am a huge memory keeper. I was always the Historian in clubs in high school and loved taking pictures and putting them in scrap books. I have a craft closet and one shelf is dedicated to my old, bulky, beautiful scrapbooks. But they are SO expensive to create! Seriously! Just printing out 100 pictures is about $15 plus shipping and then add fancy paper, stickers, glue it gets pricey and time consuming. So what I do is create a yearly book through blurb.com.
How to Store your Photo Memories
This is NOT a sponsored post and zero affiliate were used, I just really, really love my Blurb books! I have made a yearly book with them for 8 years (yes! EIGHT) and I cherish these books. Like I would grab them in a fire (after my baby and dogs) cherish them. Here’s why-
- They are beautiful! The hard cover image-wrapped cover looks so professional and then the nice paper inside is heavy. They are gorgeous and feel expensive
- They are 100% customizable. All you have to do is download blurb’s free software to design your book and then you can customize it however you like.
- They are affordable. You know I like a good deal. These are $75-$100 for a book, but you can usually find a coupon. Even without one, I think $100 is a good price for a whole year’s worth of photos. If you were to print the 2000 photos that were in my book, that would be around $300, plus the price of a few albums.
- They are compact. Way smaller than printing out 2000 photos and putting them in an album or scrapbook!
Here’s how to make a photo book of you year:
- Journal your activities and narrow down your pictures throughout the year. I personally have a private, free blog on blogger.com and blog every two weeks the previous weeks activities. (If you don’t have a blog, I would suggest journaling in a word document and keeping a file of your favorite photos that accompany that activity). The beauty of Blurb is their software uploads your blog and all of the pictures. It makes it SO easy!
- As you journal, add to the book. So if you wrote about your child’s birthday party, next put it in the book. That way, at the end of the year you don’t have hours and hours of editing on your hands
- Determine how long your book will be for. My book is a year long and goes from my anniversary in September to the next September which is confusing sometimes! I would suggest starting with January and going through December to keep it simple. Some people create books for trips or big events (wedding, new baby).
- Use the same style and be consistent. There are so many ways to customize these books, but I think consistently using the same style through your books will keep them looking uniform and are easier for you to edit
I can’t tell you how many times I have grabbed one of my books to see what we were doing in years past. My husband and I love to look through old ones and see our travels and the fun things we did with our friends. And I am sure that Don will love looking through them too!
My suggestion for printing photos (besides display ones) is to not do it! I just really think that making a yearly book is cheaper and more beautiful. Let me know if you create a book and how you like it! My latest one just came in the mail and it was like Christmas to get it! I loved flipping through it and see my stomach get huge and read my baby’s birth story. I am SO happy that I have taken the time to document our lives.
DIY Instagram Wall Hanging
Hi Friends! This week I am in Idaho for work- I have pre-scheduled posts for this week since I will be working my fanny off. I decided it would be fun to do a photo week! To kick it off, we are starting with how to make a DIY Instagram Wall Hanging.
Hanging in my hall, I have a framed DIY Instagram wall hanging. It is one of my favorite things, so I thought I’d share how to put it together and up keep it.
Note: Affiliate links may be used. See my disclosure for details
This is the inspiration photo for my project. Found here. I love Instagram (who doesn’t, right?!), but I also love seeing my photos printed out (check back on Wednesday for my other solutions for printing your photos on a budget and beautifully). For this DIY you need three things:
- A Picture Frame (the bigger the better! Mine is ——- I can fit —– photos on it). I always get my large frames from the thrift store and then paint them. This is the most cost effective way to buy a frame- they are usually about $5. Don’t pay attention to color- focus on size and the details. Even if it has something ugly framed, don’t worry, you can just throw that out.
- An Insert. You can tape your pictures right to the wall, but I didn’t want to deal with the potential mess and like the idea that I can move my wall hanging. I had the lightest piece of wood I could find at Home Depot cut to the size of the picture frame. I then painted my wood insert a mint color and assembled my frame.

- Pictures. To print pictures, I go to Walmart and use their HP photo printing machines. All you need to do is plug in your phone or jump drive and select the Instagram photos you want to print. I print them the 4″x6″ size. Make SURE to select the “do not crop” button and your photos will print perfectly- just with two white strips on the sides. You will need to trim the white edges off (they end up being 4″x4″), but this is by far the cheapest way I have found to print my Instagram photos $0.29 per photo! Another option is to take a screen shot of your Instagram photos and then you can send them anywhere to be printed without worrying about them being zoomed in and turning out weird (this distortion is what usually happens when you send a square Instagram photo in to be printed). For a visual, here is a great post on this. Again, you will just need to cut off the excess. This is the cheapest option as you can get 4×6 photos for as cheap as $0.09 if you order ahead. You can also get your Instagrams printed for $0.50 each at Social Print Studio, but you will have to pay for shipping and they require you to print 24 at a time.
- Adhesive- I like to use these square stickers to adhere the photos to the wood (the link is for Amazon or you can get them at Michael’s). They stay put, but don’t damage the wood when I take old photos off. I also use washi tape (the black and white striped tape is from Target) to tape up my Instax photos.

To upkeep, I like to print pictures every few months. I make an album in my phone of my favorites and print about 10-15 photos from that album every 2-3 months. When I have new photos, I just take my least favorite old photos off the wood and put in a photo album or throw them away. It is a bit of a pain to have to print out pictures every few months, but it is fun to see the new photos up and enjoy them with my family. Worth it 🙂
How to Install Chair Molding
Good Morning! I gave you a sneek peek last Friday of my chair molding- didn’t it turn out great?! Here us the post on how to install chair molding. Last Monday I decided was the day to buy the materials and put it up. So I headed to Lowe’s with my baby and bought all of the materials I needed. He was way off schedule from Day Light Saving time, so we were there bright and early. We looked ridiculous because I put him in a carrier and was pushing a big cart loaded with everything we needed, but I did it!
Side note, I found pre-made picture molding for sale at Lowes in case that is helpful to anyone. There were a bunch of styles for $10-$13 each. This would be such a fast and simple way to customize your house! I am too picky on my sizes for this to work for me, but I wanted to pass it on:
I got home, put my baby down for a nap and was scared and overwhelmed to start. I didn’t really know what I was doing! But I got going anyway and gathered all of my tools.
Tools for Install Chair Molding:
- Chair Molding (I bought 5 of the 8′ size)
- Level
- Blue Painter’s Tape
- Hammer
- Finish Nails
- Miter Block
- Tape Measure
- Caulk
- Liquid Nails
- Caulking Gun
- Wood Filler
- Sand Paper
- Paint Brush
- Paint
- Paint Stirrer
- Drill
- Drill Bits
- Hack Saw
- Drop Cloth
- Plans
- Nail Setter (not shown)
- Wet rag (not shown)

First step was using the level and going around and drawing a line with pencil where the top of the chair molding will be (read this post on planning for installing chair molding for how I decided to put the top of the molding 37″ off the ground). This was the only time I used the level for this project. Thank goodness I didn’t try to use it when I was installing the trim- with two people it would have worked, but by myself it would have been too much to do.
Next was cutting the first piece of molding. I used my picture from my plans to decide what angle to cut it on. I measured twice and cut. At first I used a clamp to hold the trim in place, but it was hard to keep perfect this way, so I eventually ditched it. One thing I had to be careful with was making sure I was measuring correctly on the piece of wood. So if you are cutting on an angle, you need to measure from the highest point on where the saw hits the wood. I would cut a piece of molding, install it, and then repeat to make sure I was cutting accurately.
After that, I prepped for putting up the boards. First I ripped off pieces of blue painter’s tape and put them on the wall. Later, these will hold your boards in place while the glue dries.
Next, I pre-drilled holes into the wood in three spots so I could nail up the trim. I laid out a drop cloth under where I was working and put nails and a hammer on the ground so I could easily grab them. This step was a life save for me! It saved the trim from splitting and made it fast and easy to hammer up the board later.
The last prep I did was apply Liquid Nails to the back of the board to be installed
Now it was time to put my board on the wall. This was hard to do alone! But I came up with some steps that made it easier for me as I worked:
- Put in a nail to the center of your board in the hole you just drilled. Start in the middle so you have the most leverage. Get your board in place and then nail in your center nail.
- Now you can start at an end, nail the end of your board in and then start adding in the blue tape and working your way to the other end where you will hammer in your last nail and finish installing the blue tape
- Use your wet rag and wipe off any excess Liquid Nails
Isn’t that corner pretty?! Haha! I was rather proud of my self that it was working!!
As the nails were getting installed, I would use a nail setter and hammer in the nails so they were below the trim’s surface. This makes it so you can putty the hole and won’t be able to see nail holes after you paint. #professional
Lastly, I put in the wood filler in where two boards meet and where any nail holes and sanded off any extra after it dries. After a few hours of having the blue tape up, I took it down. So, and you can tell I didn’t paint or caulk the trim. I am still going to add in picture molding (as discussed here), so I will paint and caulk after everything is up.
When I was done with my project, I still had a bunch of Liquid Nails and didn’t know how to keep it from drying out so I can use it again. I Googled it and found out that you can put a big screw in the opening and that should keep it fresh!
Since I will be installing the picture molding next weekend, but I don’t want to live in a construction zone (especially with a crawling baby), I put all of the tools I will need again in a hamper in a closet. I used this method when I was painting two weekends in a row. I have a clean house, but when I am ready to work on my project again, I can just pull out a basket and have all of the tools ready for me! So convenient!
Chair Railing Sneak Peek and Epiphany
Hi Guys! Guess what, putting up the chair molding went great! Here is a sneak peek:
Chair Railing Sneak Peek and Epiphany
I also have a full post on the process with lots and lots of photos, but I just don’t have time to put it up now. I am crazy busy with work opening up a store so I have been pre-writing blog posts for while I am out of town with that. I ran out of time to get this post up :(.
I wanted to share an epiphany that I had. I always tell my husband that when I am rich I will always have fresh flowers in my house. But I got thinking about it and I AM rich. I technically don’t have a ton of money, but I do have a rich life. I have an amazing family- I fall more in love with my baby every day and it sure is magical watching my husband do the same. I have a job I love. I am having so much fun with this blog and being creative at home! So I put flowers on my grocery store list. When I went to the store I saw a bin of clearance flowers and the exact ones I wanted were in there for $1.25. It felt magical! So you don’t have to be rich to have flowers in your life, maybe you just have to know what you want and be brave enough to go for it.
Happy weekend! I have a really fun week of posts lined up for you next week- please check back 🙂