A few weeks ago my husband and I went to our friend’s new house. It was so pretty and everything was perfect. And we were jealous- haha. We love our tiny house- our friend’s house is too big for our taste, but he installed the floors himself so I convinced my husband that we could do it too. We have been saving since February for new floors, but hadn’t pulled the trigger. Once we decided to get the floors I was excited- and then scared. I’ve never picked out floors for myself before. What the heck do I do?! Well, I figured it out and am thrilled with my decision so I thought I would put together a guide for everyone out there who has a dream of beautiful floors but doesn’t quite know how to do it. Let’s start- here’s how to choose wood floors that you will love.
Step One- Measure

Decide where you want your new flooring and measure the space. I simply made a note in my phone as we measured and then added up the square footage. We decided we would like to replace the carpet/tile on the entry, stairs, living room, hall, and kitchen. Our total came to 520 square feet. Knowing the square footage is important because then you can figure out your budget. If you are having it professionally installed or if you buy your flooring from certain places, they will come out and measure for you. But having a rough idea is important when you start shopping.
 Step Two- Figure out your Budget
My husband and I have a little over $2,000 saved up. We wanted to spend less, but were flexible. Come up with a number that you would be comfortable spending so you don’t get out of control with your selection. Note, above are our totals so far. We might have to buy base boards and the wood trim for the stairs and threshold is expensive. The $310 is an estimate, so we’ll see what that number comes out to. As you can see, so far we are below budget!!!
 Step Three- Figure out what you Want
Let me be honest- I skipped this point. We measured, thought about our budget and then went to pick up samples. I thought I knew what I wanted- something dark with grey tones in it and not red. I shared an image of my samples on Instagram and asked for help from my readers. I am SO glad I did because they really helped! Here’s a few of the helpful comments:
“Dark floors are like a dark car- they look dirty right after you cleaned! Go lighter!”
“I say go with something light, my floors are darker and it drives me crazy. It shows EVERYTHING!”
“I tend to go for rustic textured floors because it hides everything and the more scuffed up they get the better they look. A really dark smooth wood floor will show literally everything!”
After reading their comments, I thought about it and decided that I should look more into mid tones with some texture in them. My husband liked that idea. We want our floors to look better, not dirty all of the time!
 Step 4- Find Inspiration Images
Now it’s time to reach out to Pinterest. Look through your boards or do a search to find rooms you love that happen to have wood floors. Take a note of your favorites and what color the wood is. Here are my two favorites:
Rachel Parcell’s kitchen- shown above (via)- how gorgeous is that medium tone with the white cabinets and the pink/blue rug?! I was actually watching her snapchat and was like- hold the phone, her floors are gorgeous!
The store Alice Lane in SLC- again loving that medium tone and how it is the perfect warm accent. I actually went in the store to check them out and loved it just as much in person.
 (via)
(via)
 (via)
(via)
 Step Five- Get Samples
Go to the store and pick up samples. We started at two specialty flooring stores in my town. Their cheaper floors were $4-$5 (and went up to $10) a square foot and were $2.50-$3 a square foot to install. We checked out a few samples from them (I just needed to give them my name and phone number). They both had bigger samples, but I did need to return them a few days later.
Lowes- we stopped by Lowes and bought a few samples. They have smaller samples and they are $0.25 each to buy.
Home Depot- Lastly, we grabbed a few samples at Home Depot. These ones were the same size as Lowes, but free! At both Lowes and Home Depot I would find 4-5 samples I liked and take a picture of the price of the floors so I knew how much they were when I was home. At both of the big box stores we found great options for $1-$3 a square foot. By this point we had decided to install them ourselves, but they were around $1-$2 a square foot to install. Above is an image of my first choice floors (from Home Depot).

 Step Six- Live with the Samples
Take your samples home, lay them on your floor and stare at them. Consider how they look with your wall color and furniture. Look at them through the day and night. Notice how the changing of light in the room changes how they feel in the space. Which ones match your inspiration most closely? Do those ones work in your space? Pick your favorite after you have lived with and analyzed it a few days. P.s. above are all of the dark samples. We ended up going with something much lighter:
 Return the Samples & Buy your Flooring
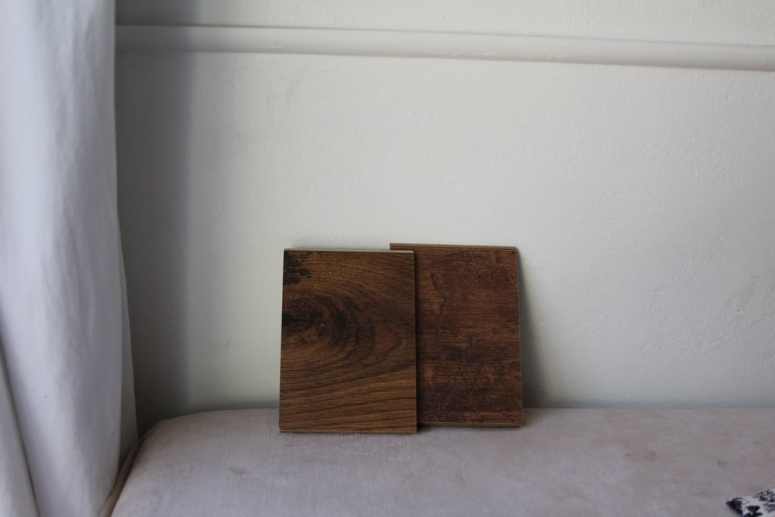
Now the moment of truth! Go to the store and buy your flooring. This was an exciting day for us- I have been wanting flooring for years and I was finally getting it!!! We went to the store and guess what? The one I had fallen in love with (left in the picture above) was out of stock. We really wanted an in-stock option because we wanted to slowly buy a few boxes, install them and then move to the next section. That felt better to live with and for our wallet. Luckily, there was an option really close to my first choice, and it was a dollar cheaper per square foot. When you need 520 square feet, it’s easy math that that will save over $500!!! We selected an underlayment and bought enough boxes for our entry. Again, having your square footage ready will be helpful so you can buy what you need. Last weekend, we were stocking up on tools needed to put in our floors and noticed that the price had gone down from $1.48 a square foot to $0.99 a square foot. We got a price adjustment for the difference and bought all they had. We still need to go to another store to get the rest, but when you are planning on spending $1300 and the price ends up being a little over $500 you jump on it.
So that’s how you choose wood floors (or laminate or engineered floors). Hopefully that was helpful to you! Check back later this week and you can see where we are on the entry!
 p.s. want a free course on how to style your accessories to look amazing? Click below to get your free ecourse!


[…] I picked out new flooring […]